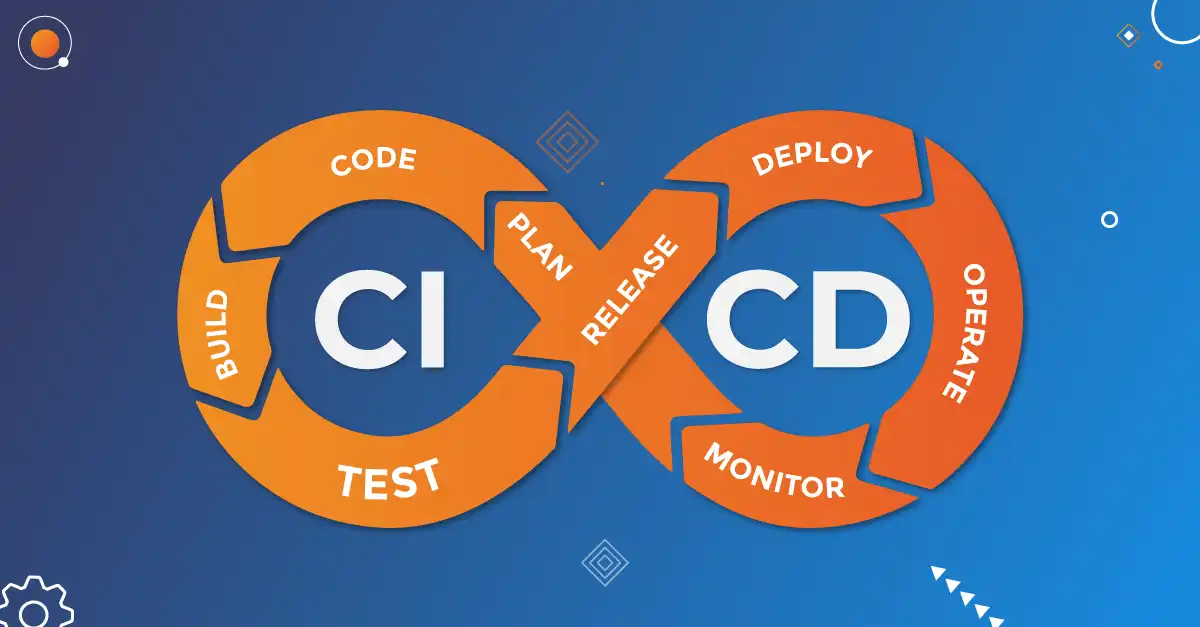
What is Continuous Deployment (CD)
CD is a software development practice automating code deployment to production continuously.
-
Version Control System (VCS): Tracks changes to source code, enabling collaboration and providing a history of modifications.
-
Automated Build: Compiles source code into executable binaries automatically, ensuring consistency and reducing errors.
-
Automated Testing: Runs automated tests to verify code changes, ensuring code quality.
-
Deployment Pipeline: A sequence of automated steps (build, test, staging, production) that code changes go through before reaching production.
-
Collaborative Culture: Encourages communication and collaboration among development, operations, and other stakeholders, often through DevOps practices and cross-functional teams.
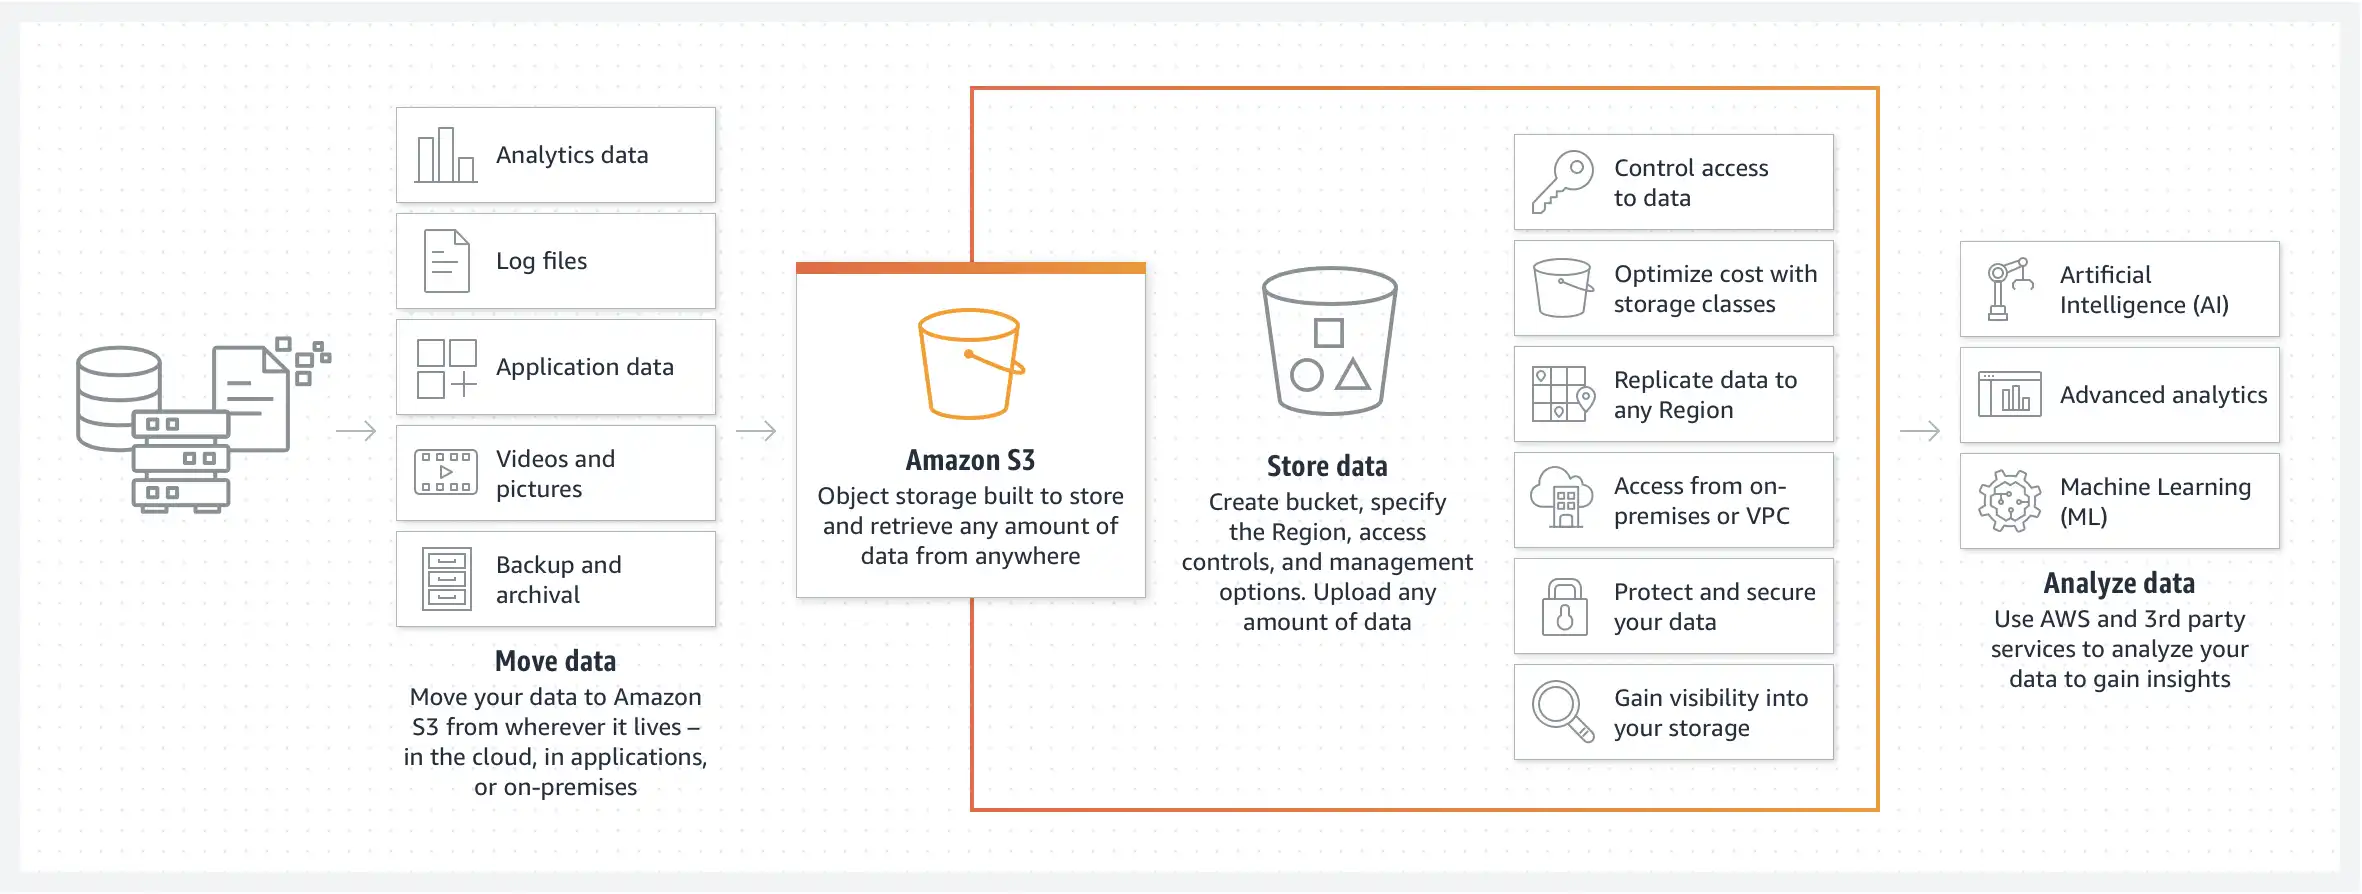
Setup AWS S3
When it comes to AWS you have several options to deploy your application: Amplify, EC2, ECS, S3, Lightsail...
Today our focus will be S3, Amazon Simple Storage Service (Amazon S3) is an object storage service offering industry-leading scalability, data availability, security, and performance.
The idea is to reply on S3 as web hosting by uploading application production build to S3 with CD configuration, we also will control when deployment jobs run.
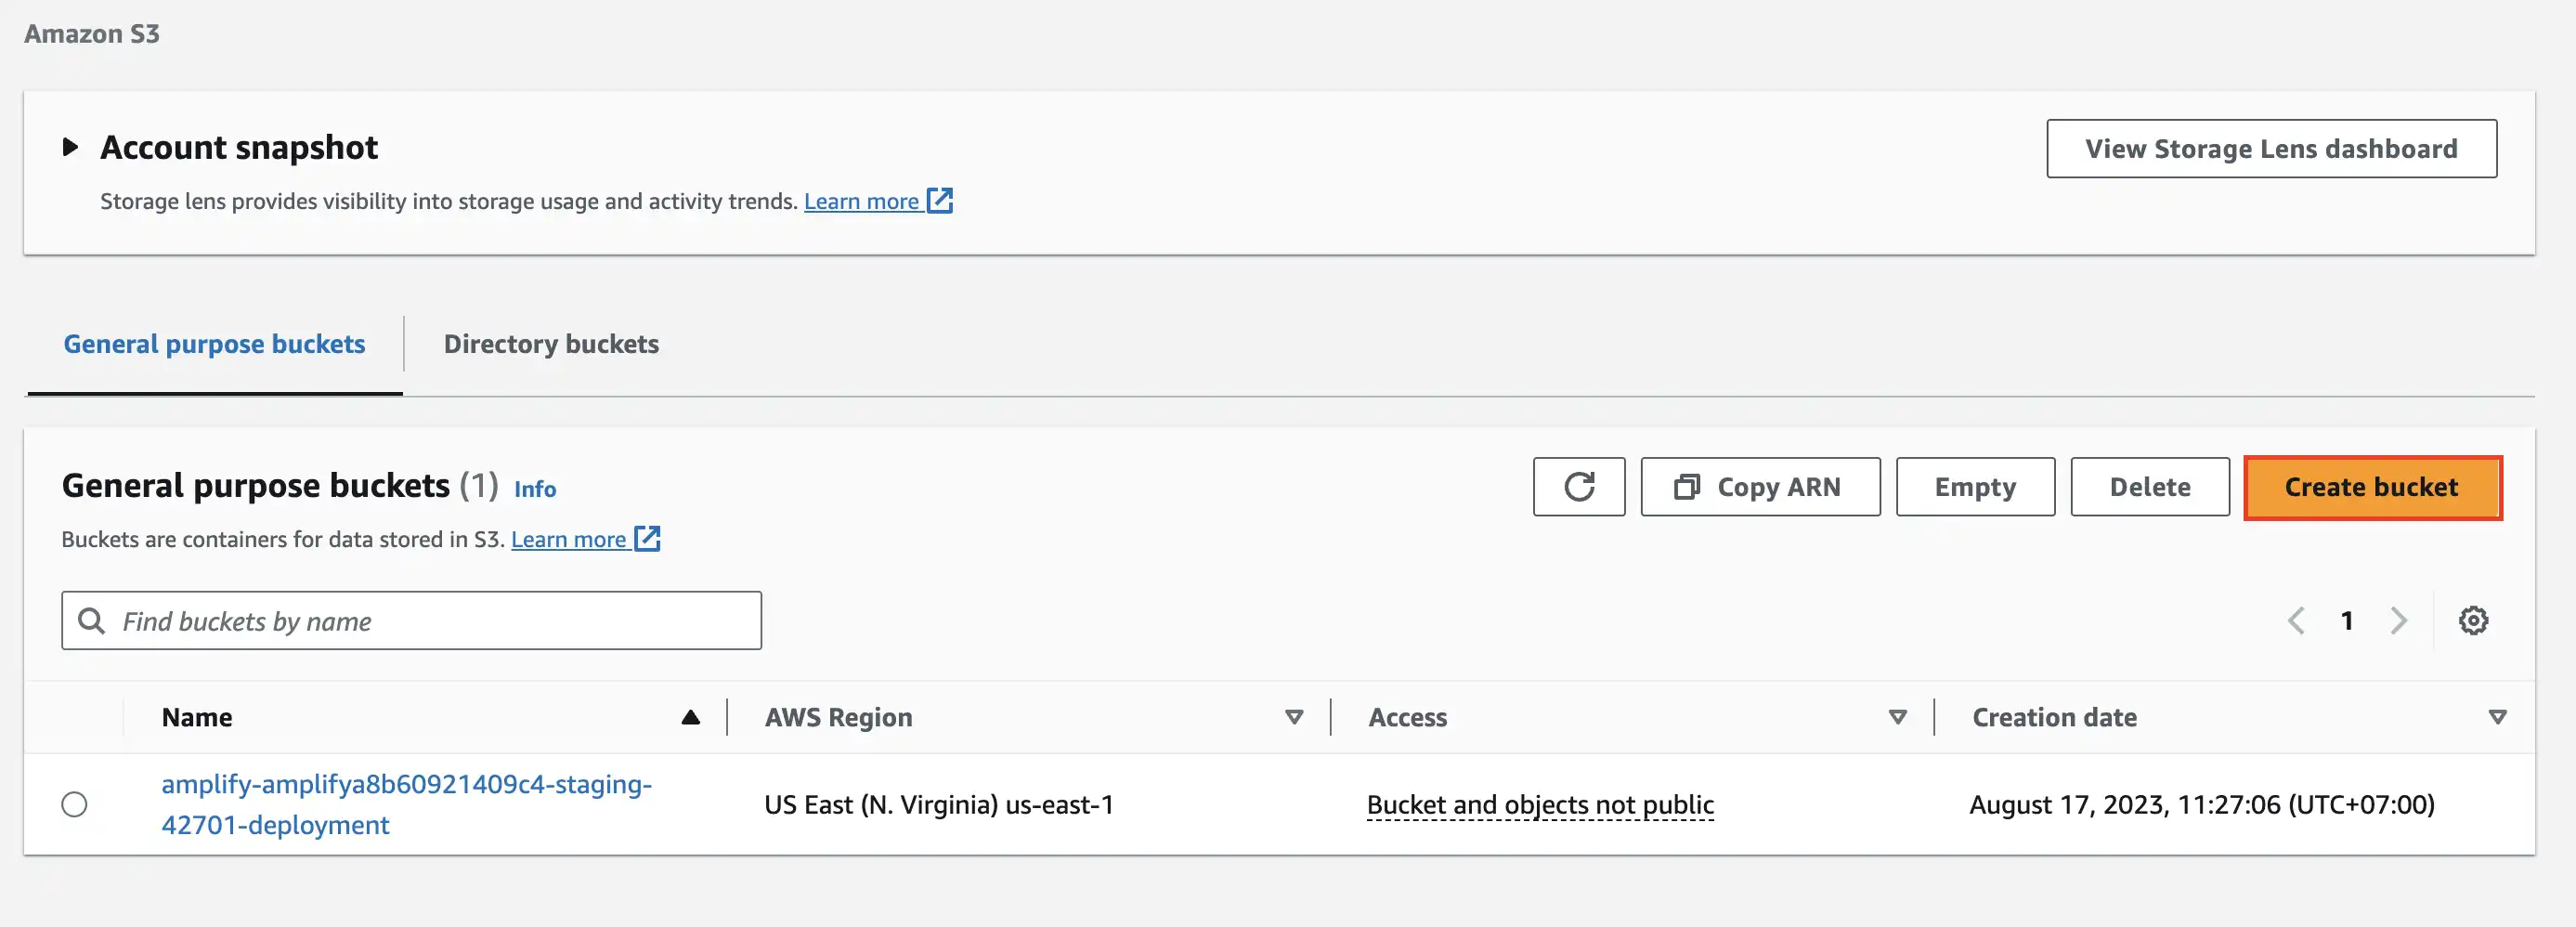
Getting started by creating a S3 bucket, by signing in to your AWS account and open S3 service
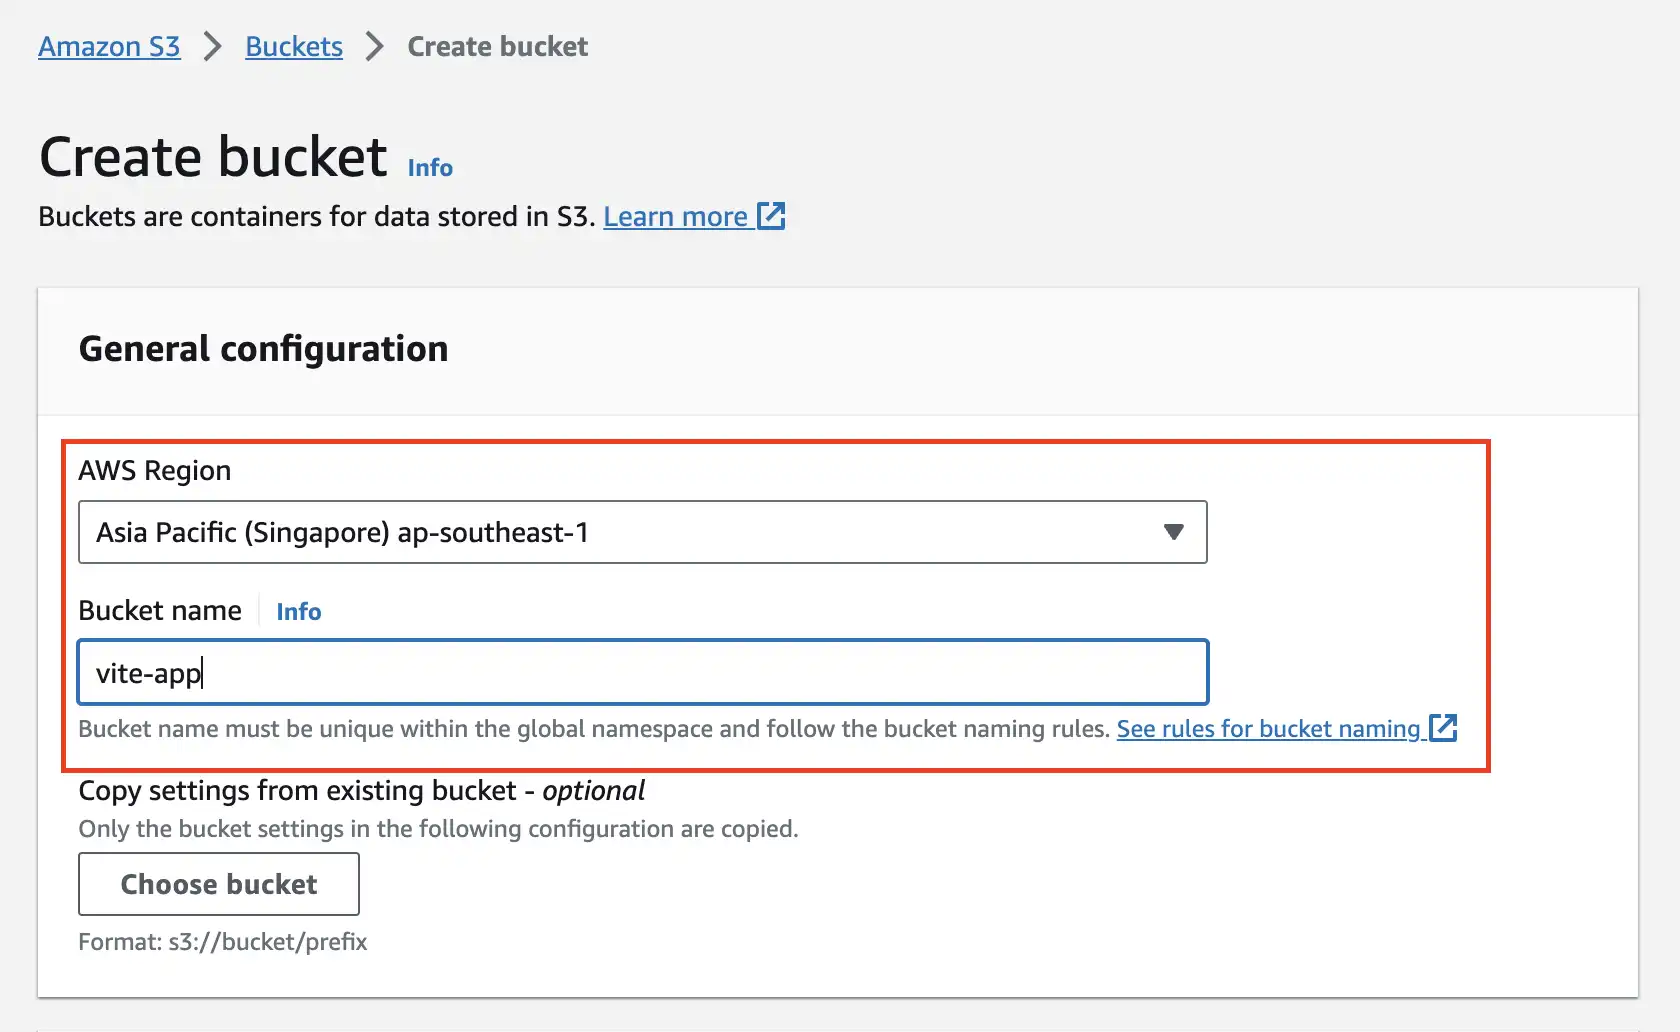
Fill in basic information, remember to pick Region that is close to your location
One last thing in this section, we will get to know aws-cli which is command line interface we use to run in CI/CD
Let's kick things off by updating pipeline configuration
Noted
- The name and version of image can be accessed from here: https://hub.docker.com/r/amazon/aws-cli/tags
We intentionally comment all other jobs to get a quick run with aws command
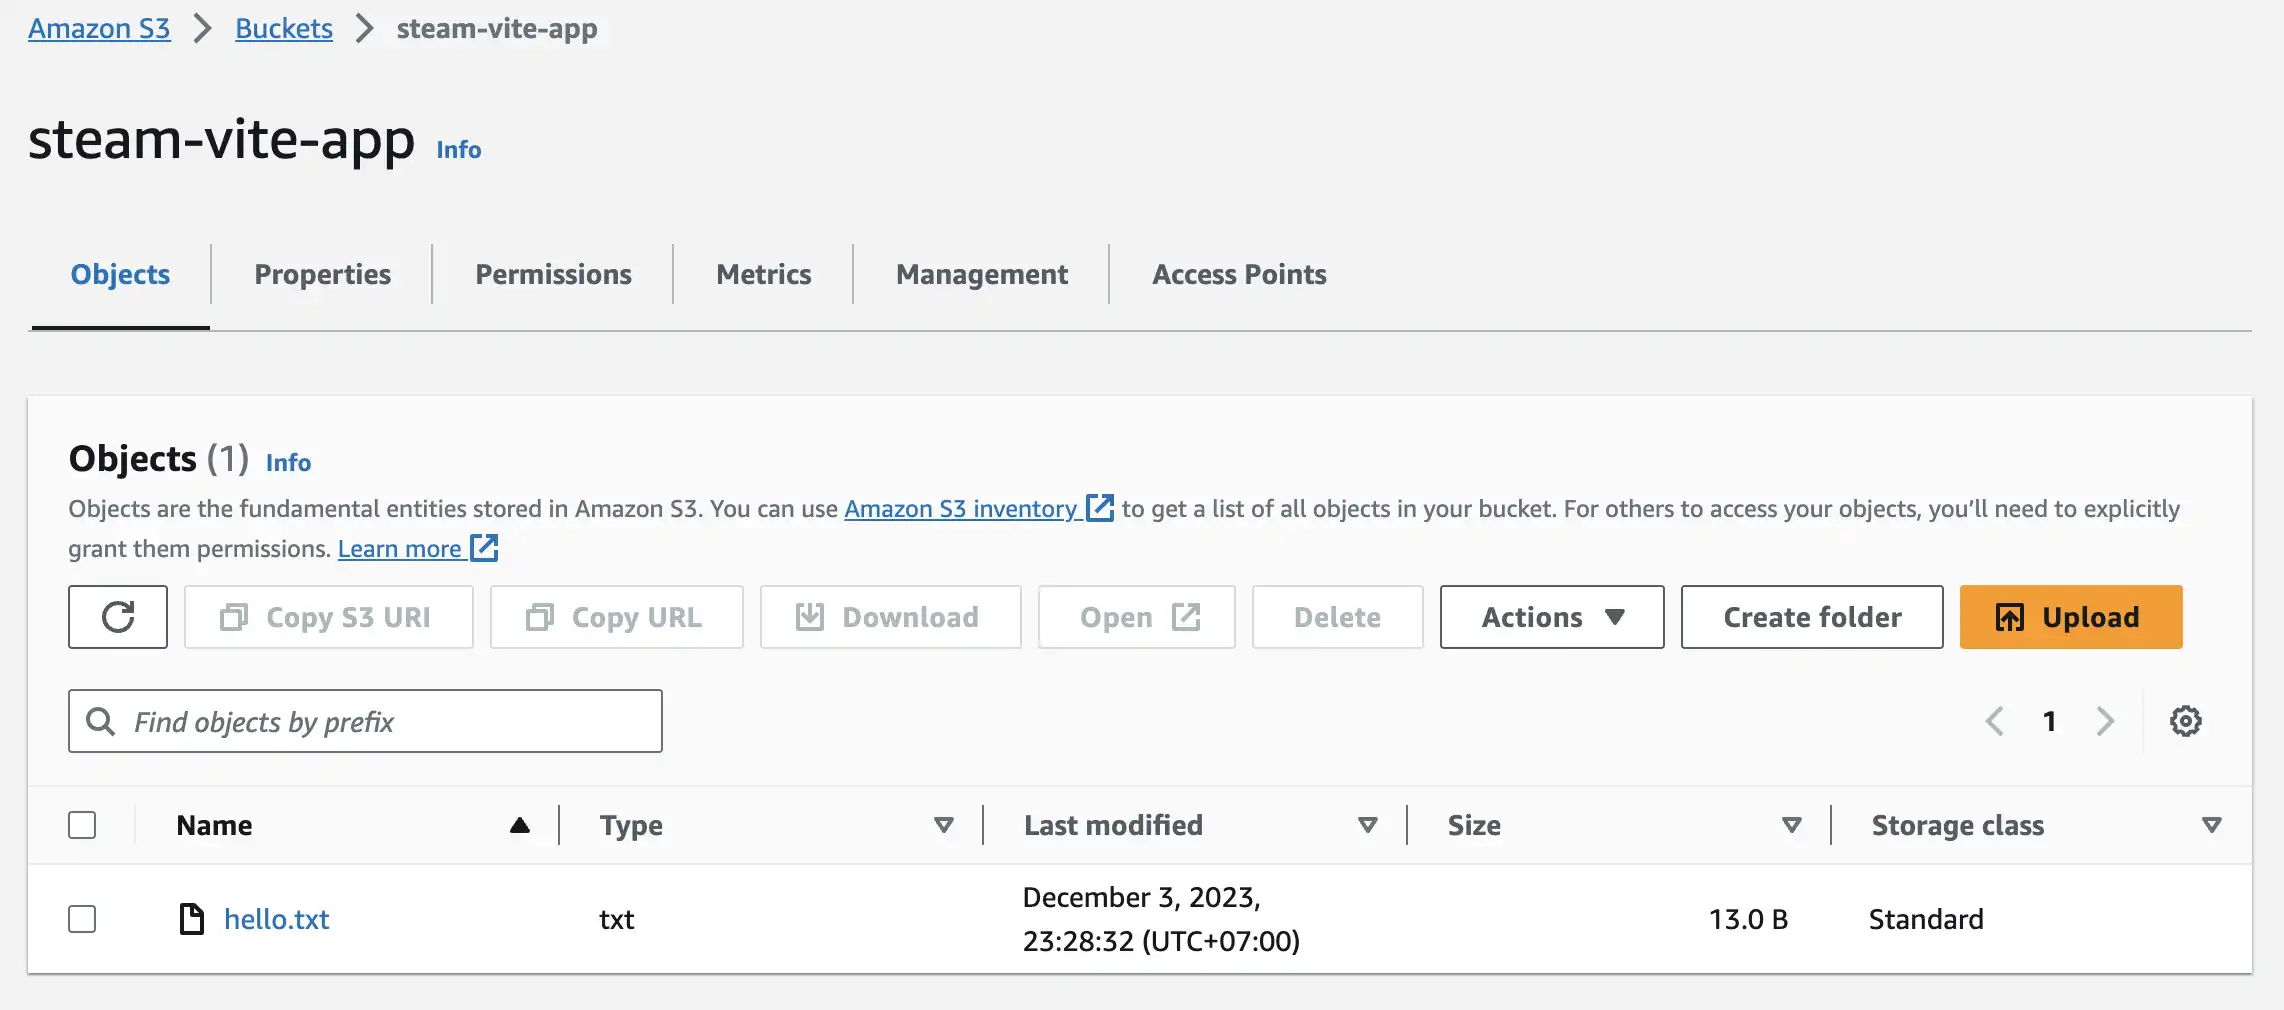
Uploading a file to S3
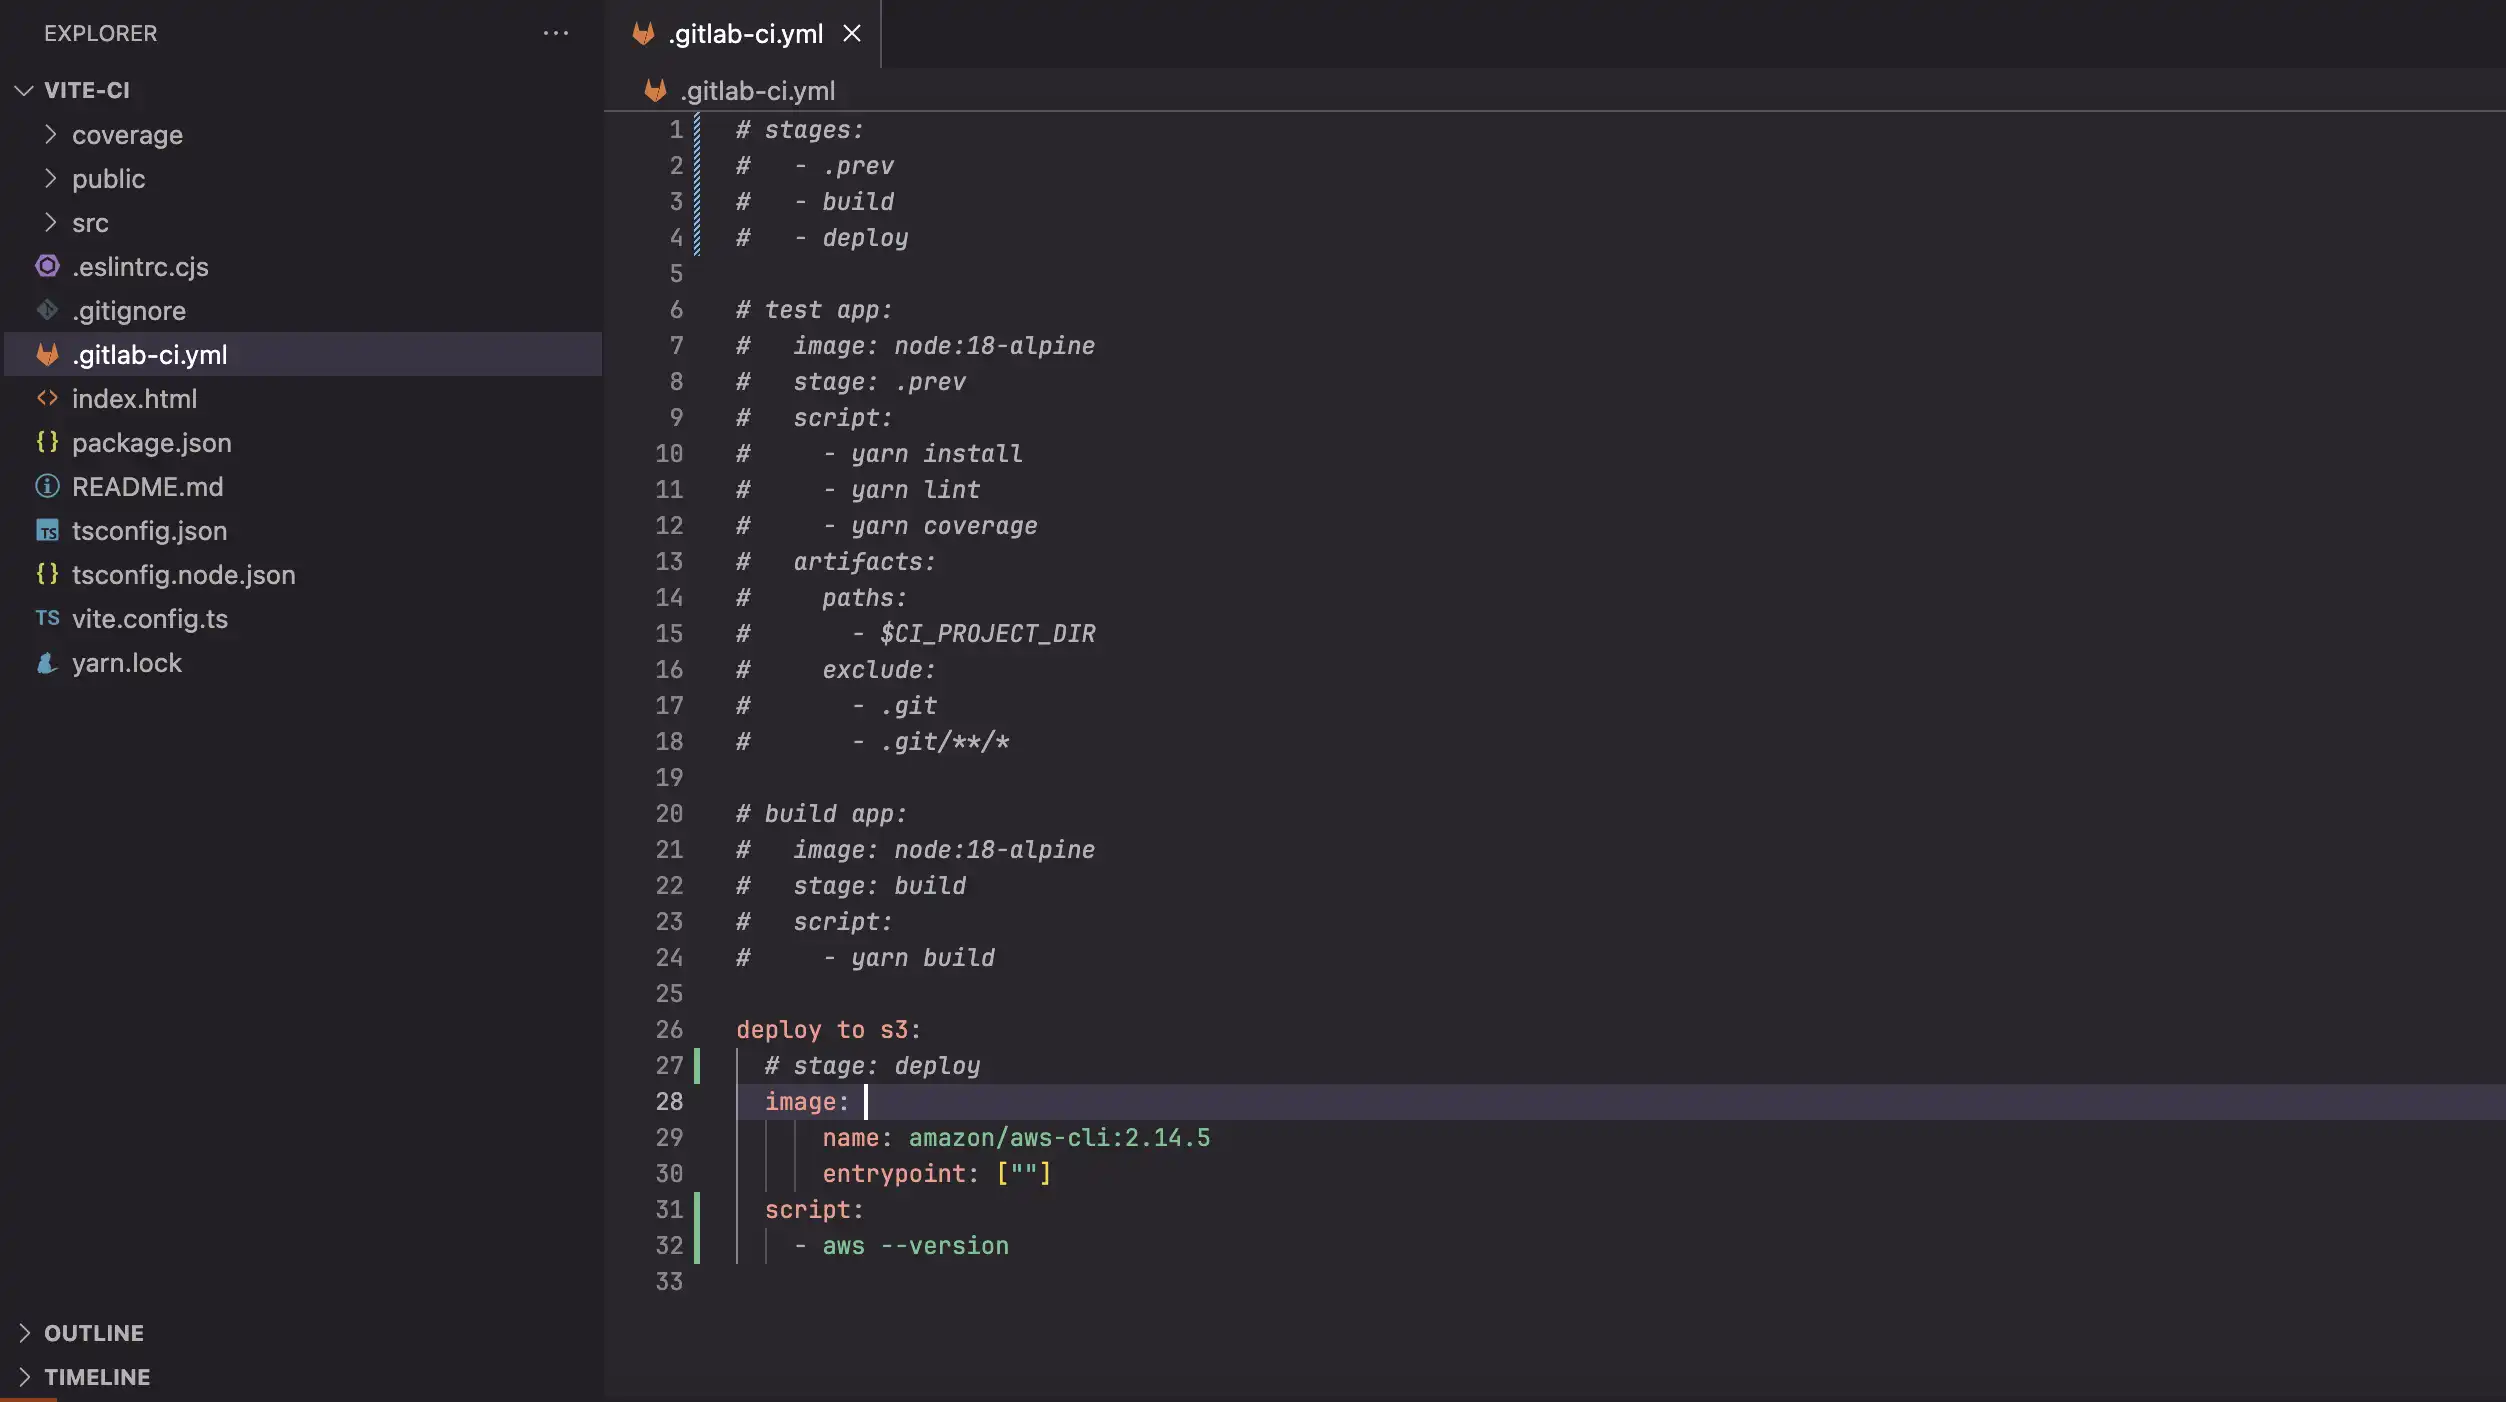
Continue by change .gitlab-ci.yml file, commit and push to MR
# Update deploy job
deploy to s3:
  # stage: deploy
  image:
      name: amazon/aws-cli:2.14.5
      entrypoint: [""]
  script:
    - aws --version
    - echo "Hello Amazon" > hello.txt
    - aws s3 cp hello.txt s3://steam-vite-app/hello.txt
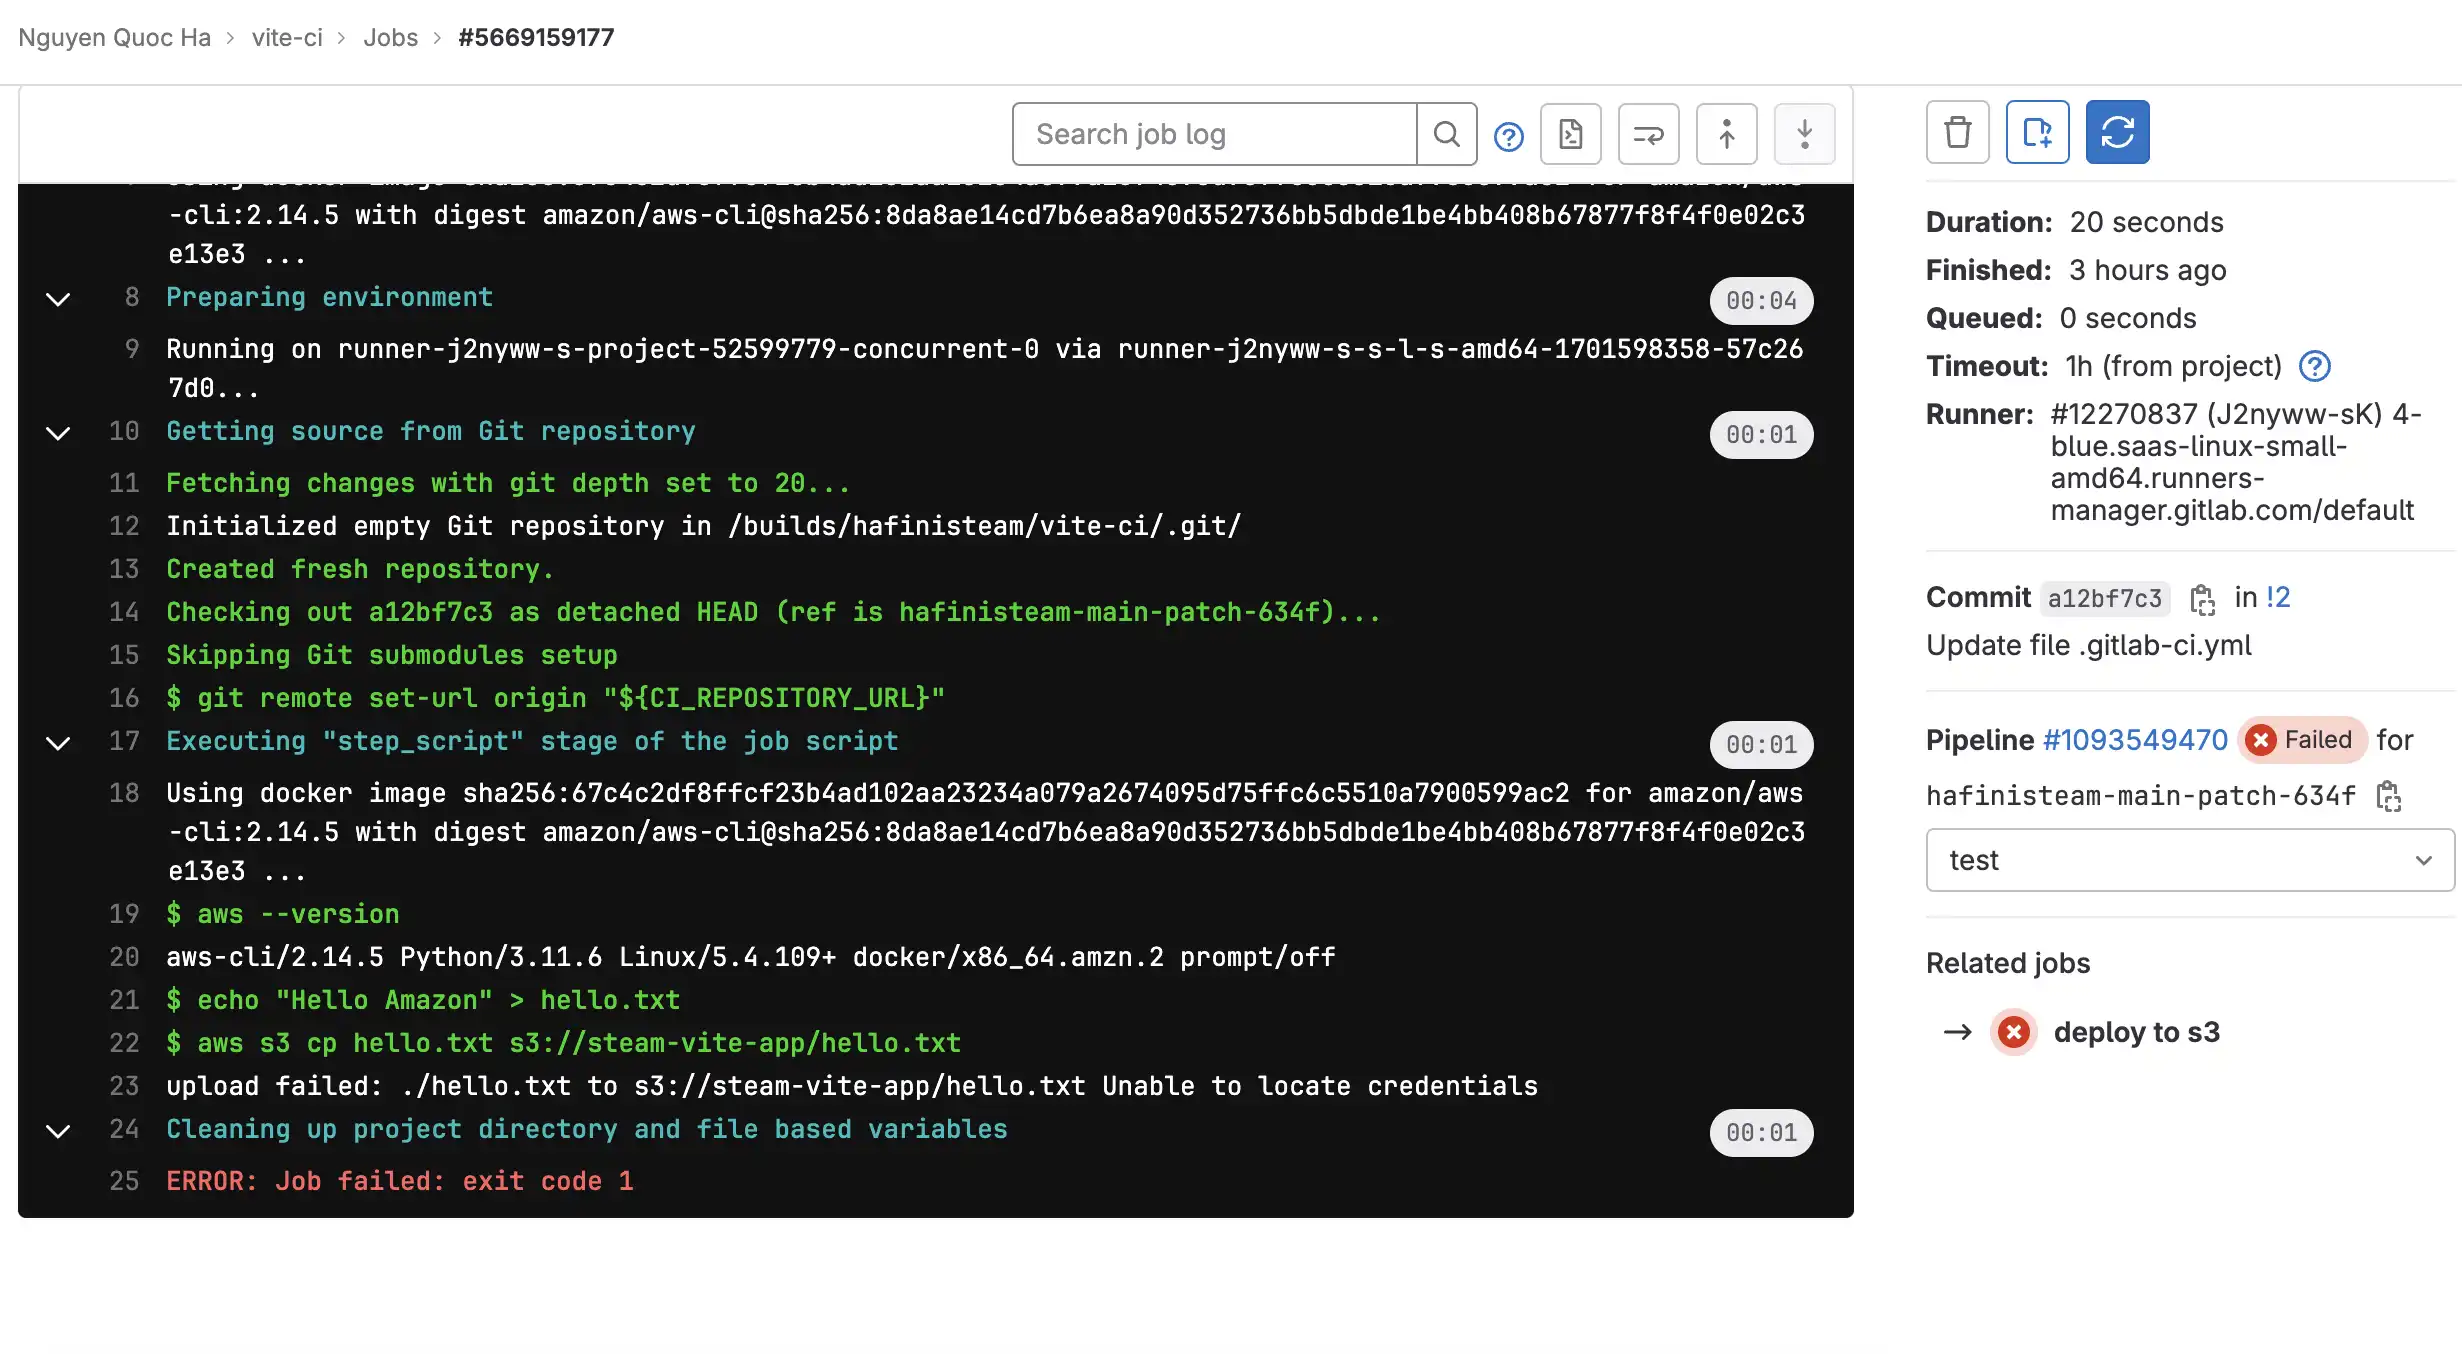
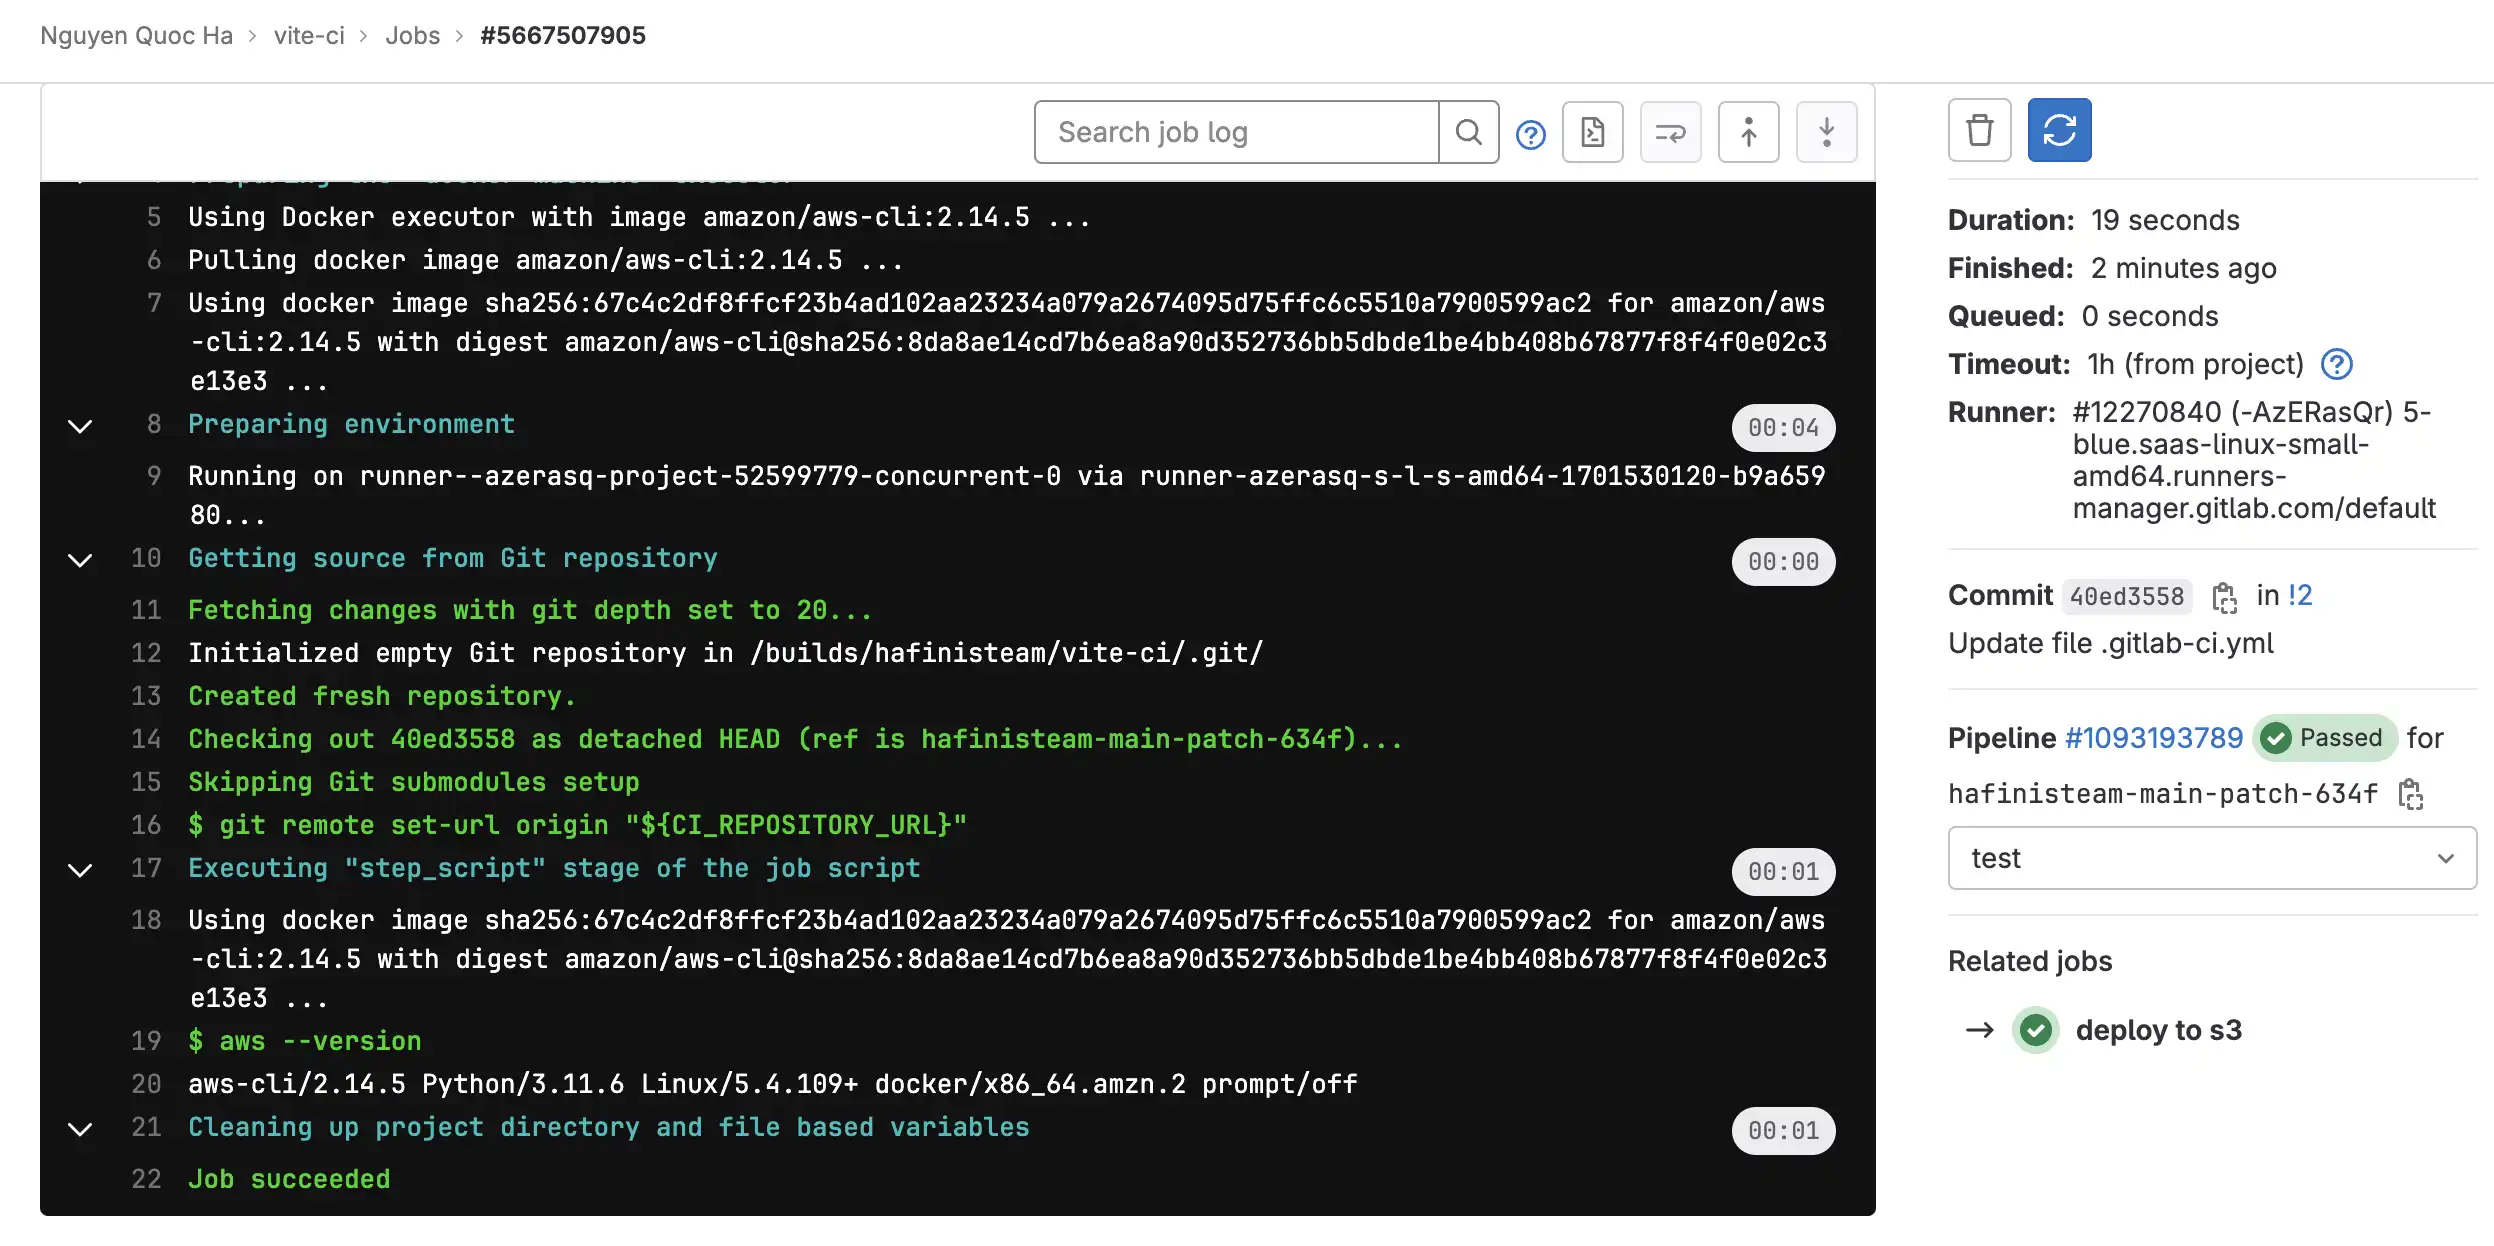
Oh well, it fails cuz we are missing credentials so we are required to do a few more steps before we can do that, let's go back to doing this later
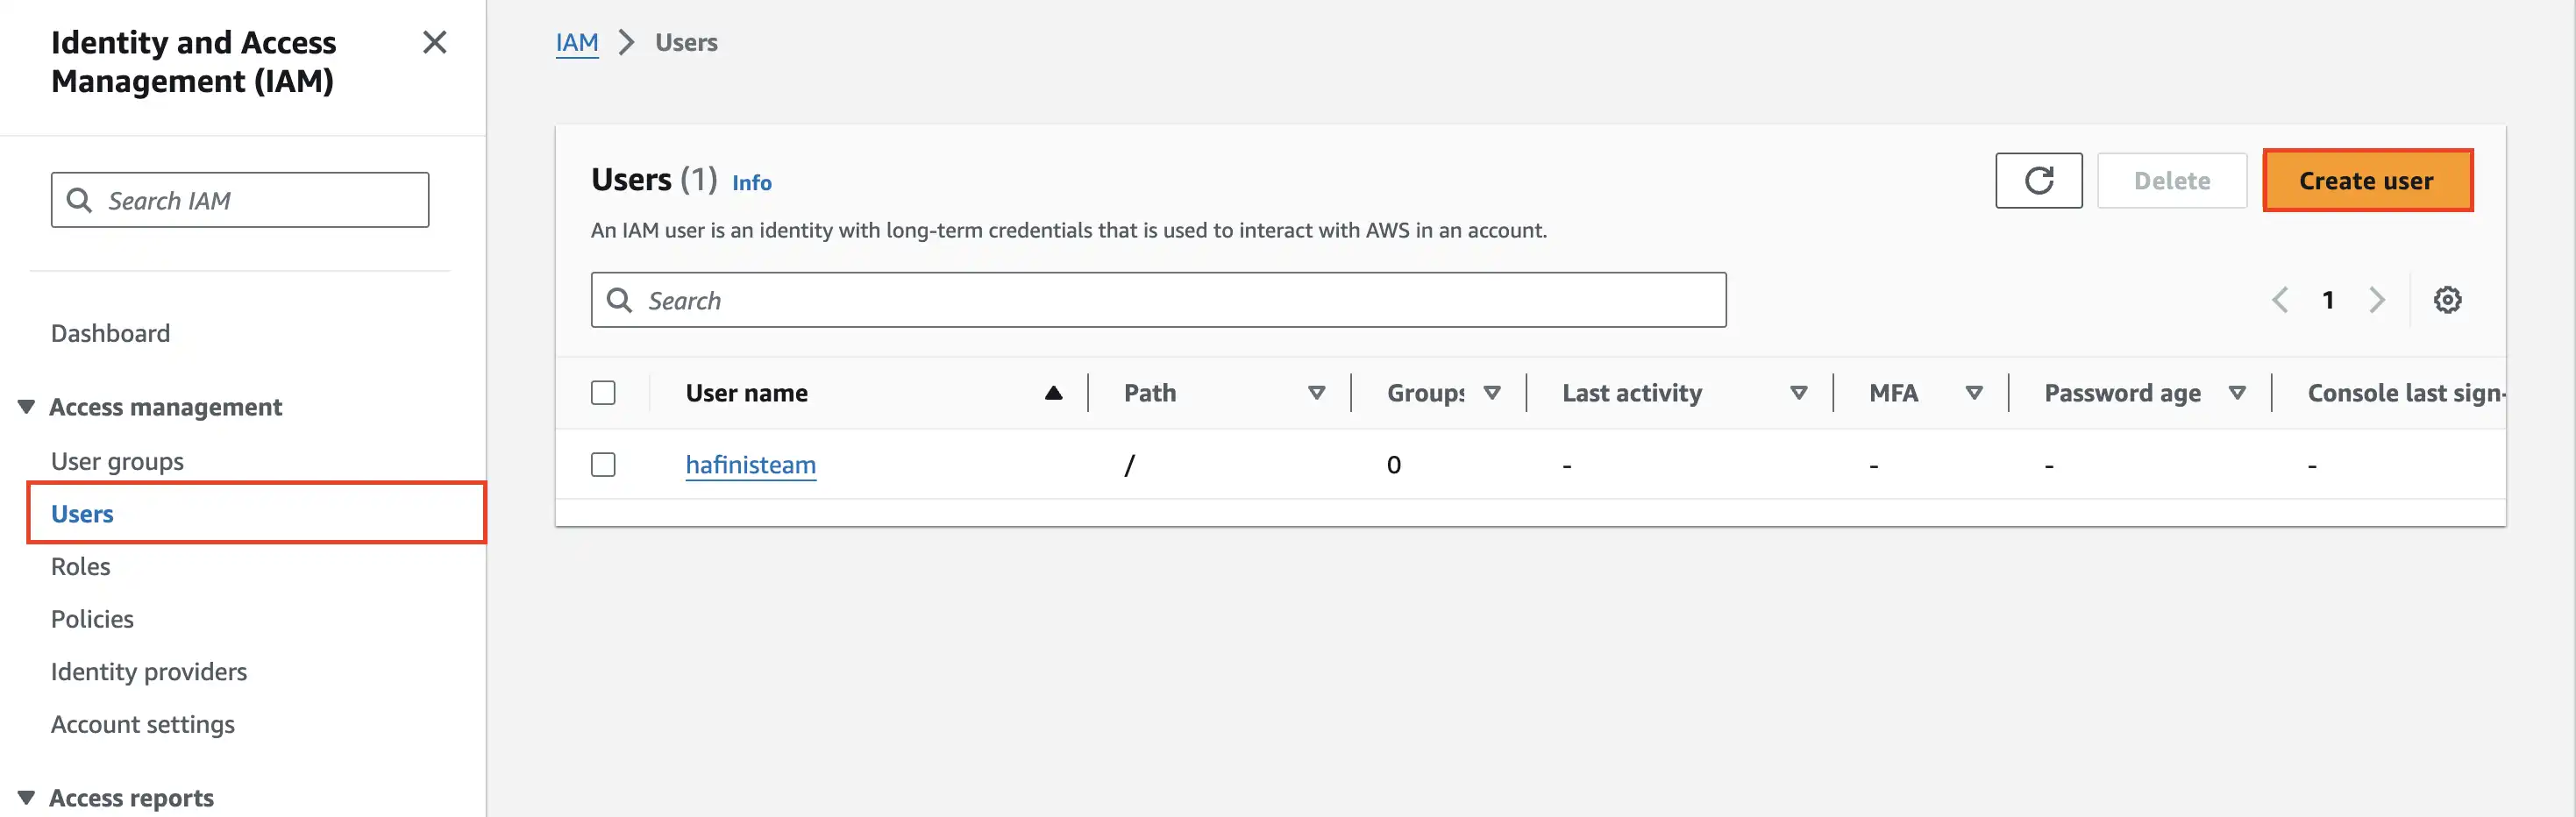
Identity management with AWS IAM
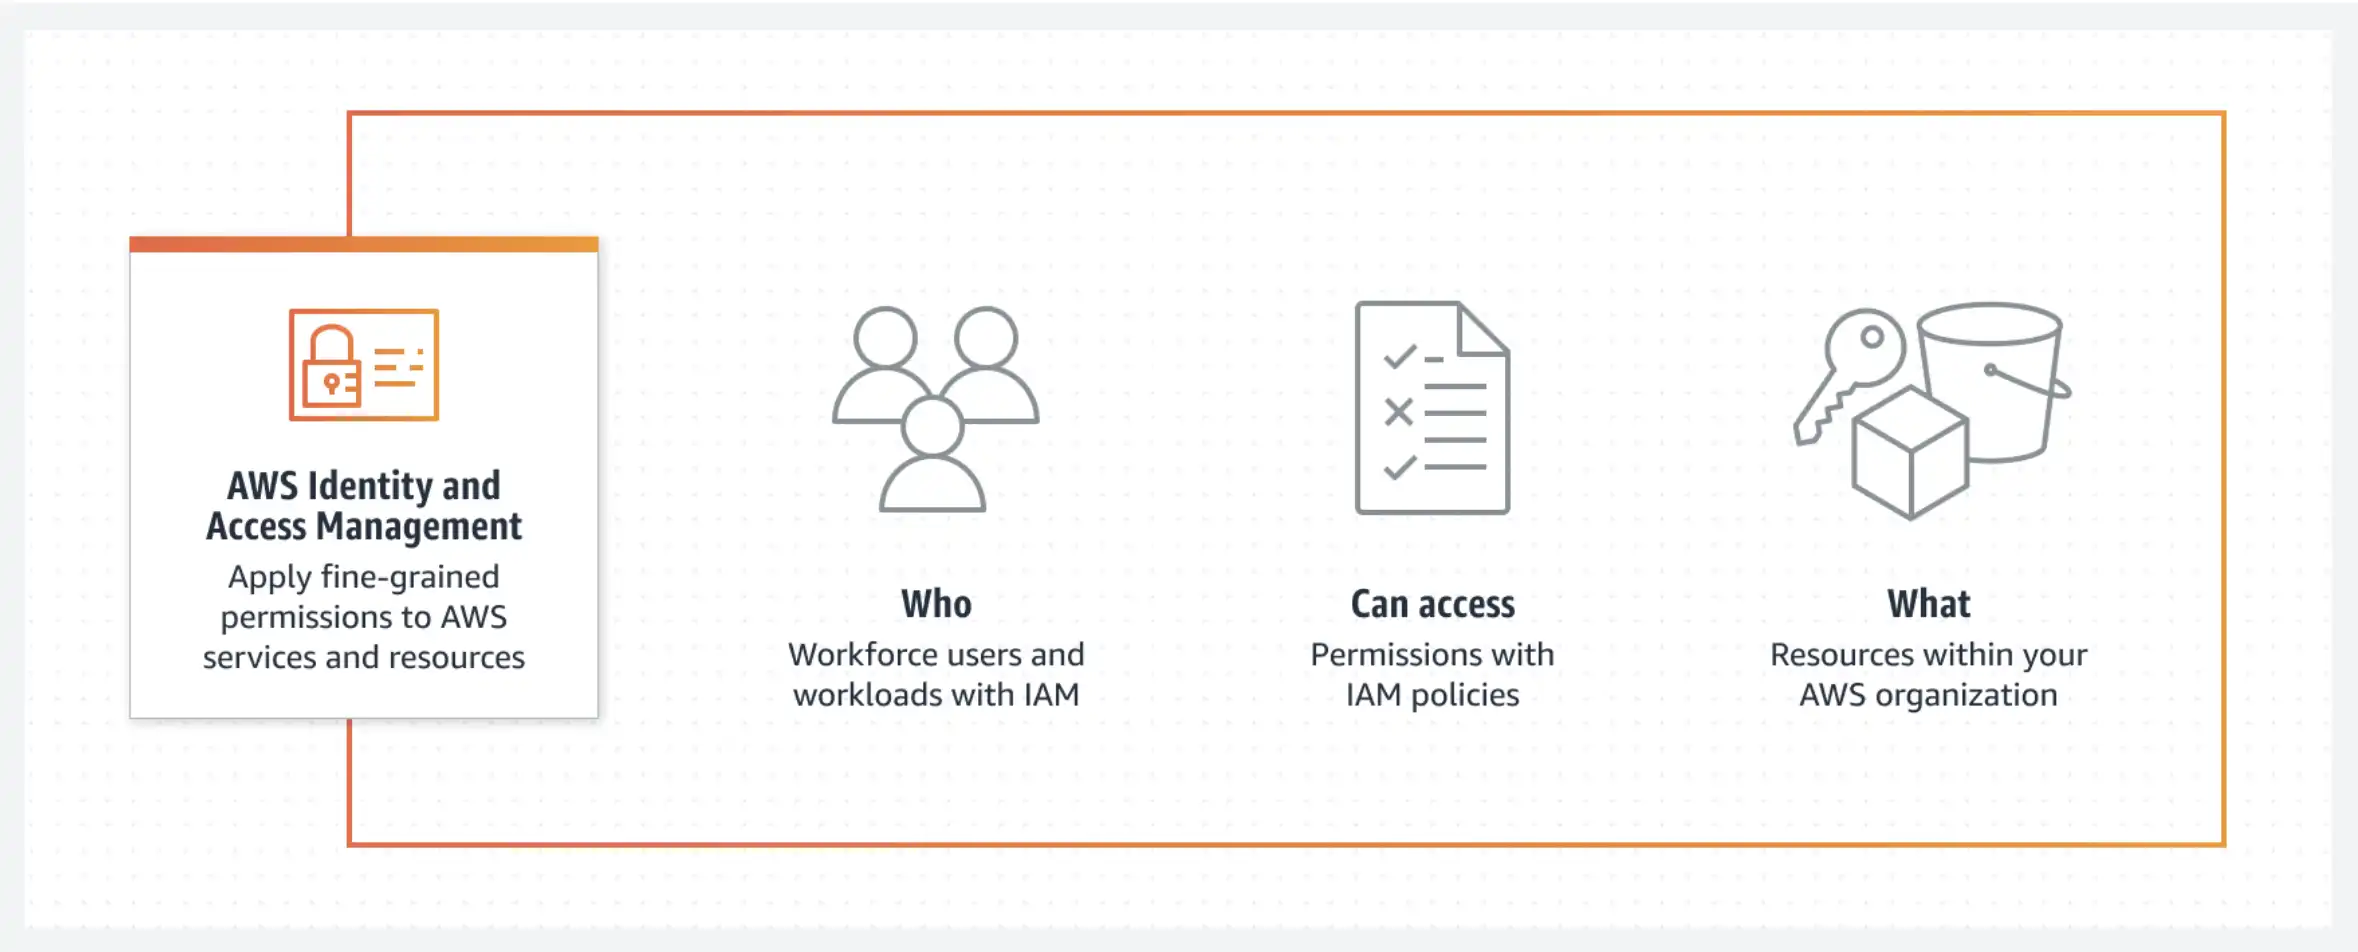
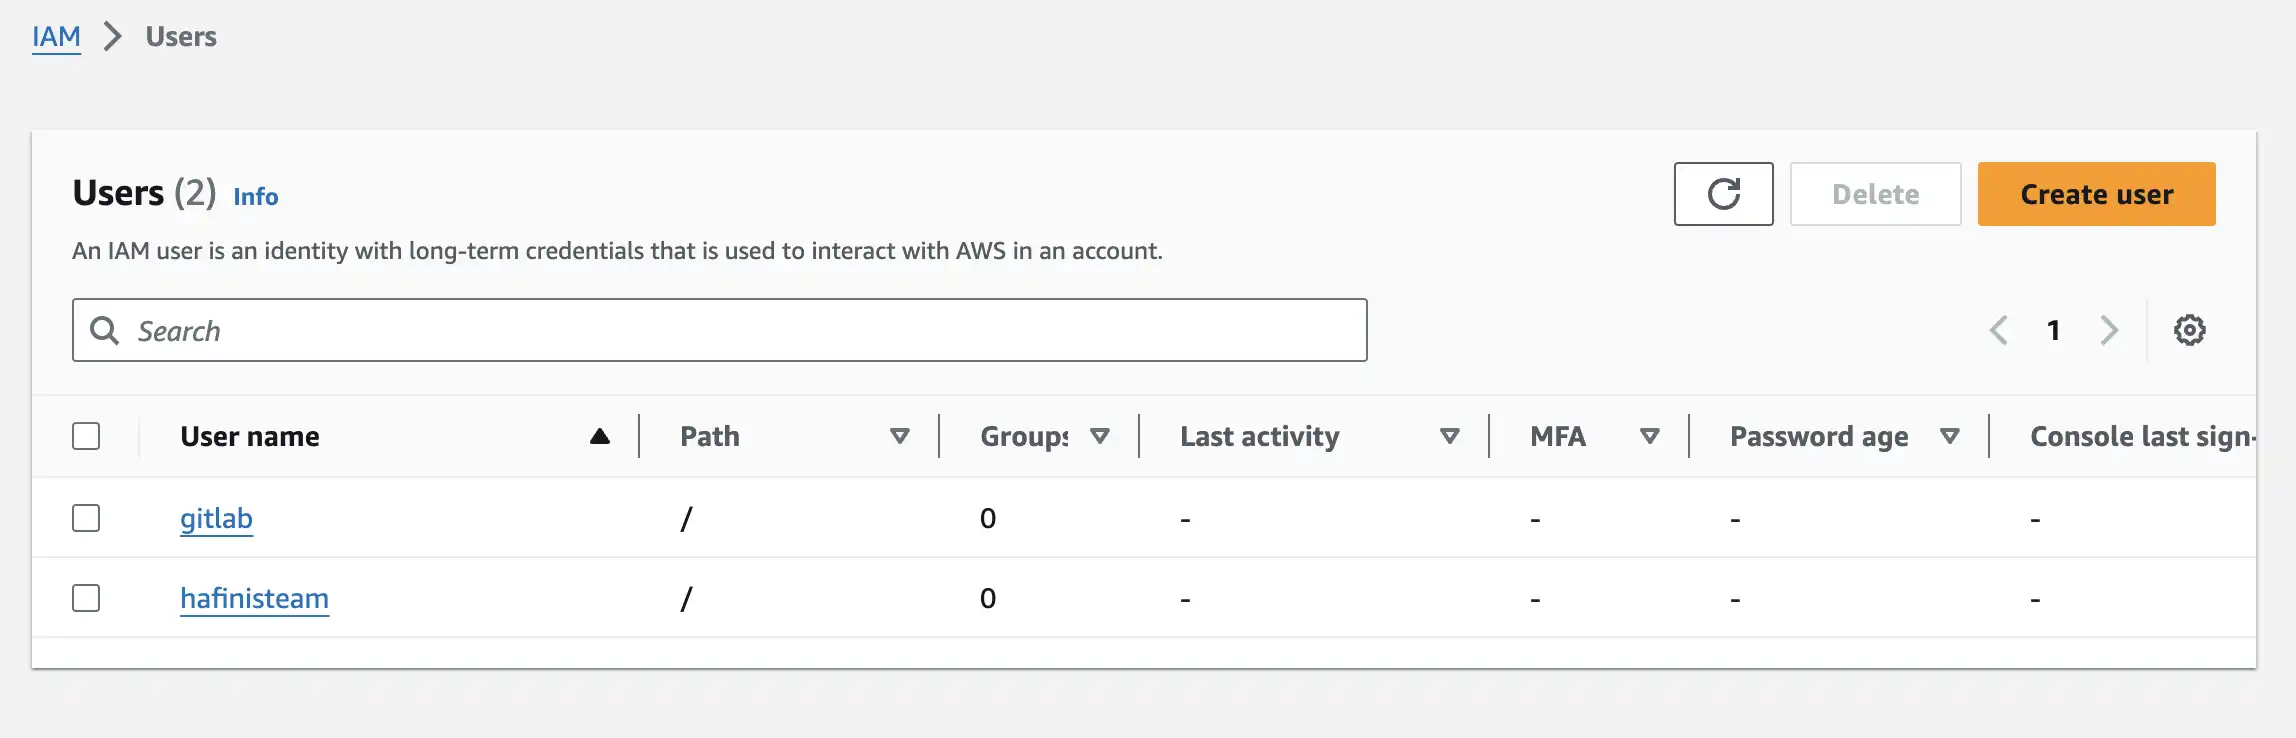
In short, before we can use AWS CLI in CI/CD, we must setup identity for CI/CD to run CLI command. Open IAM service and pick User menu item
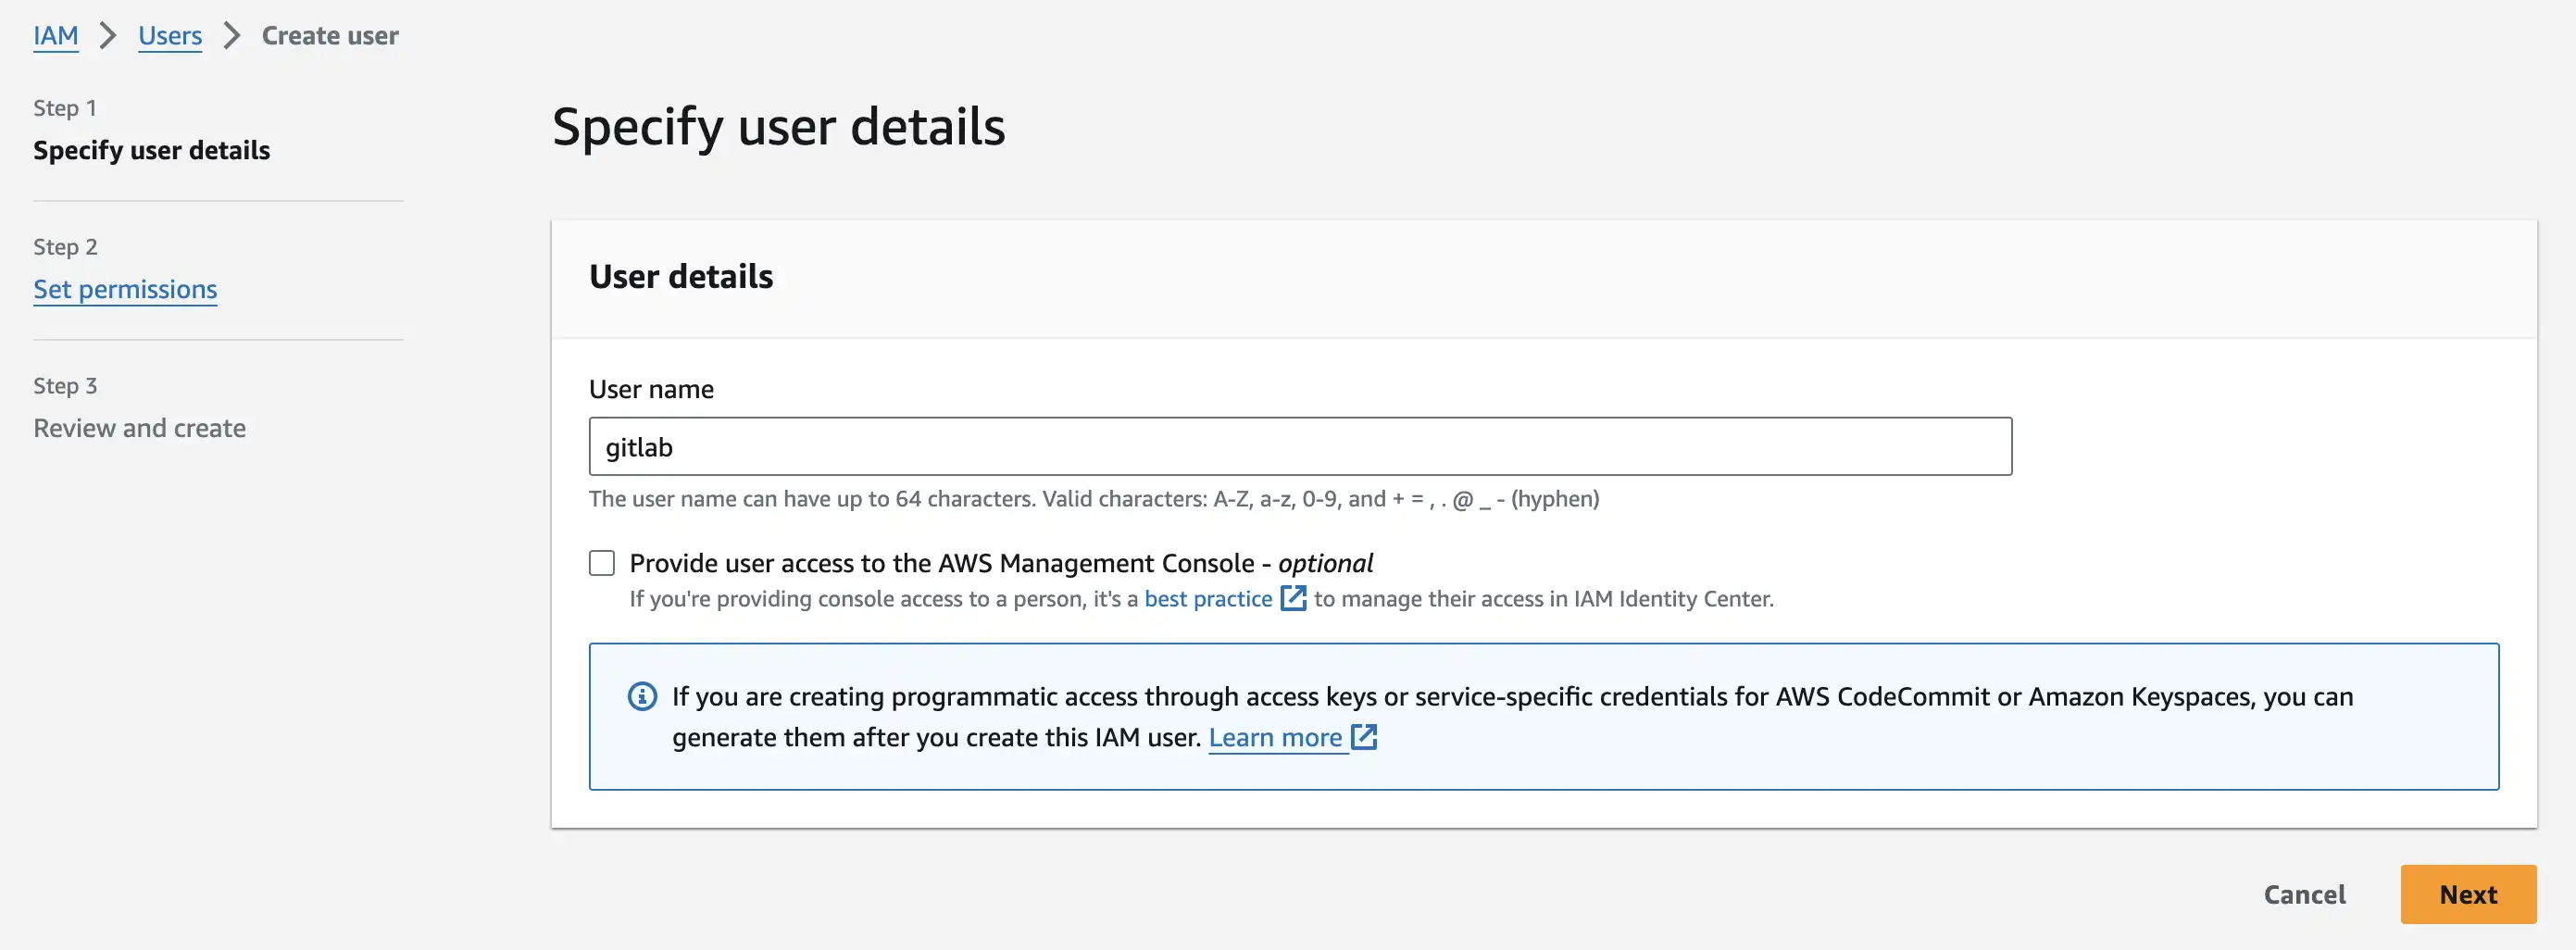
Step 1: Input username
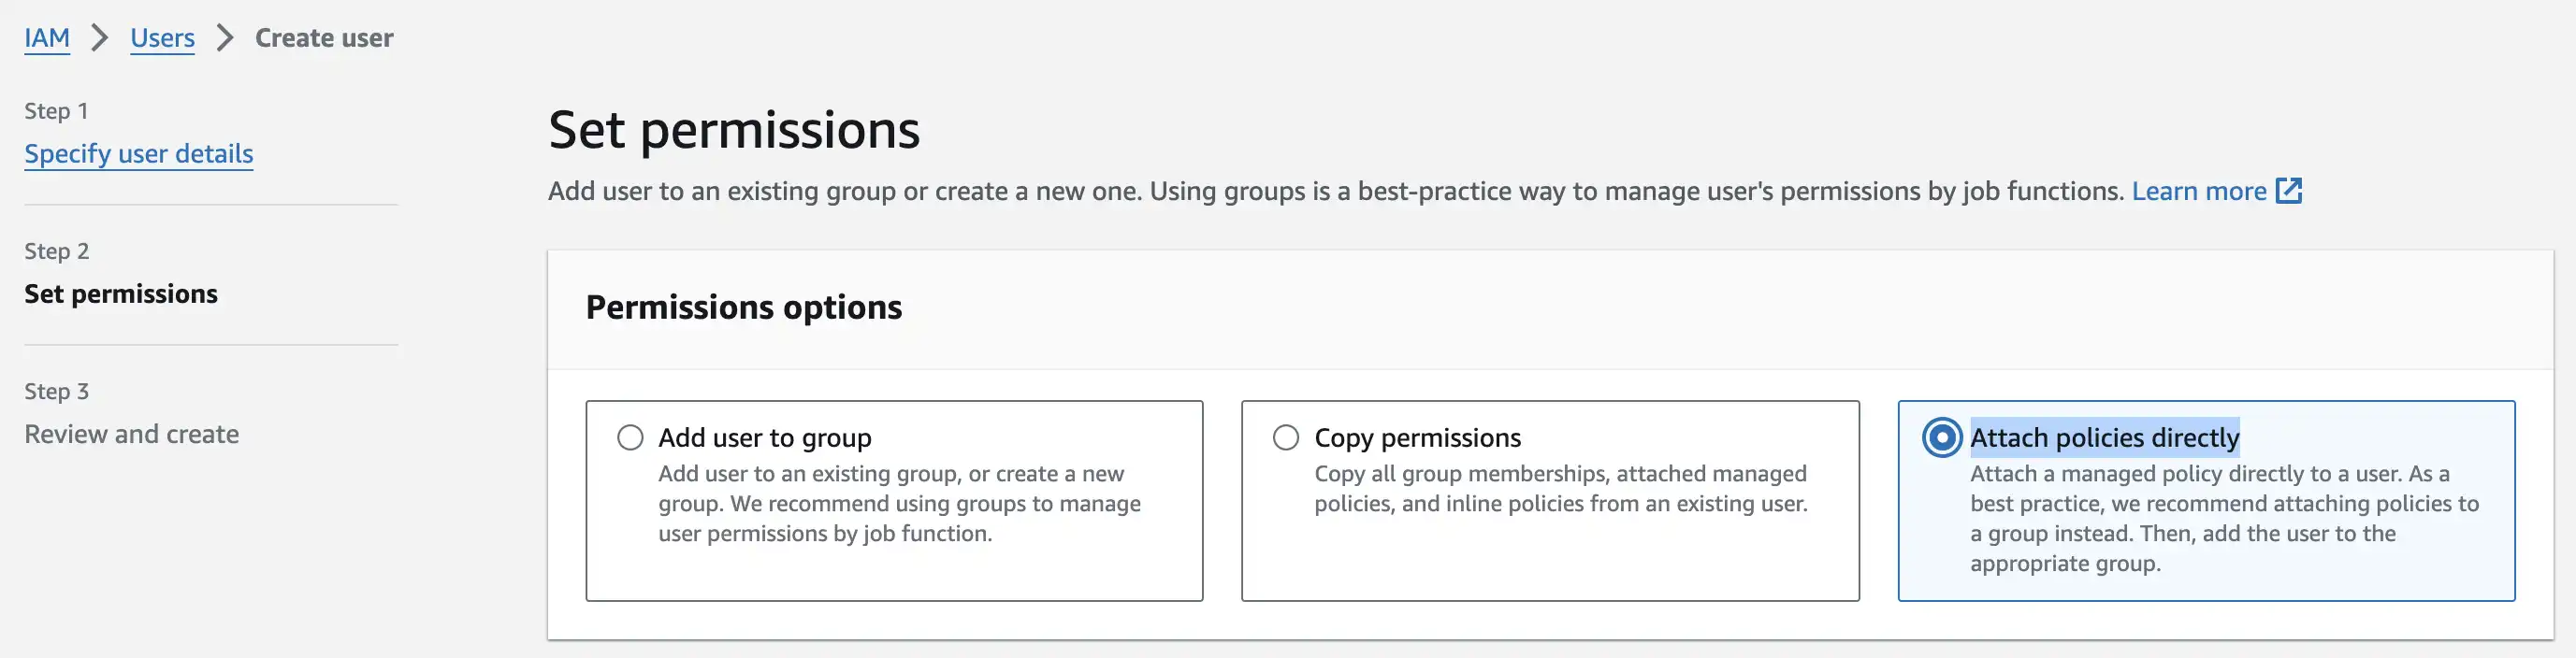
Step 2: Pick Attach policies directly
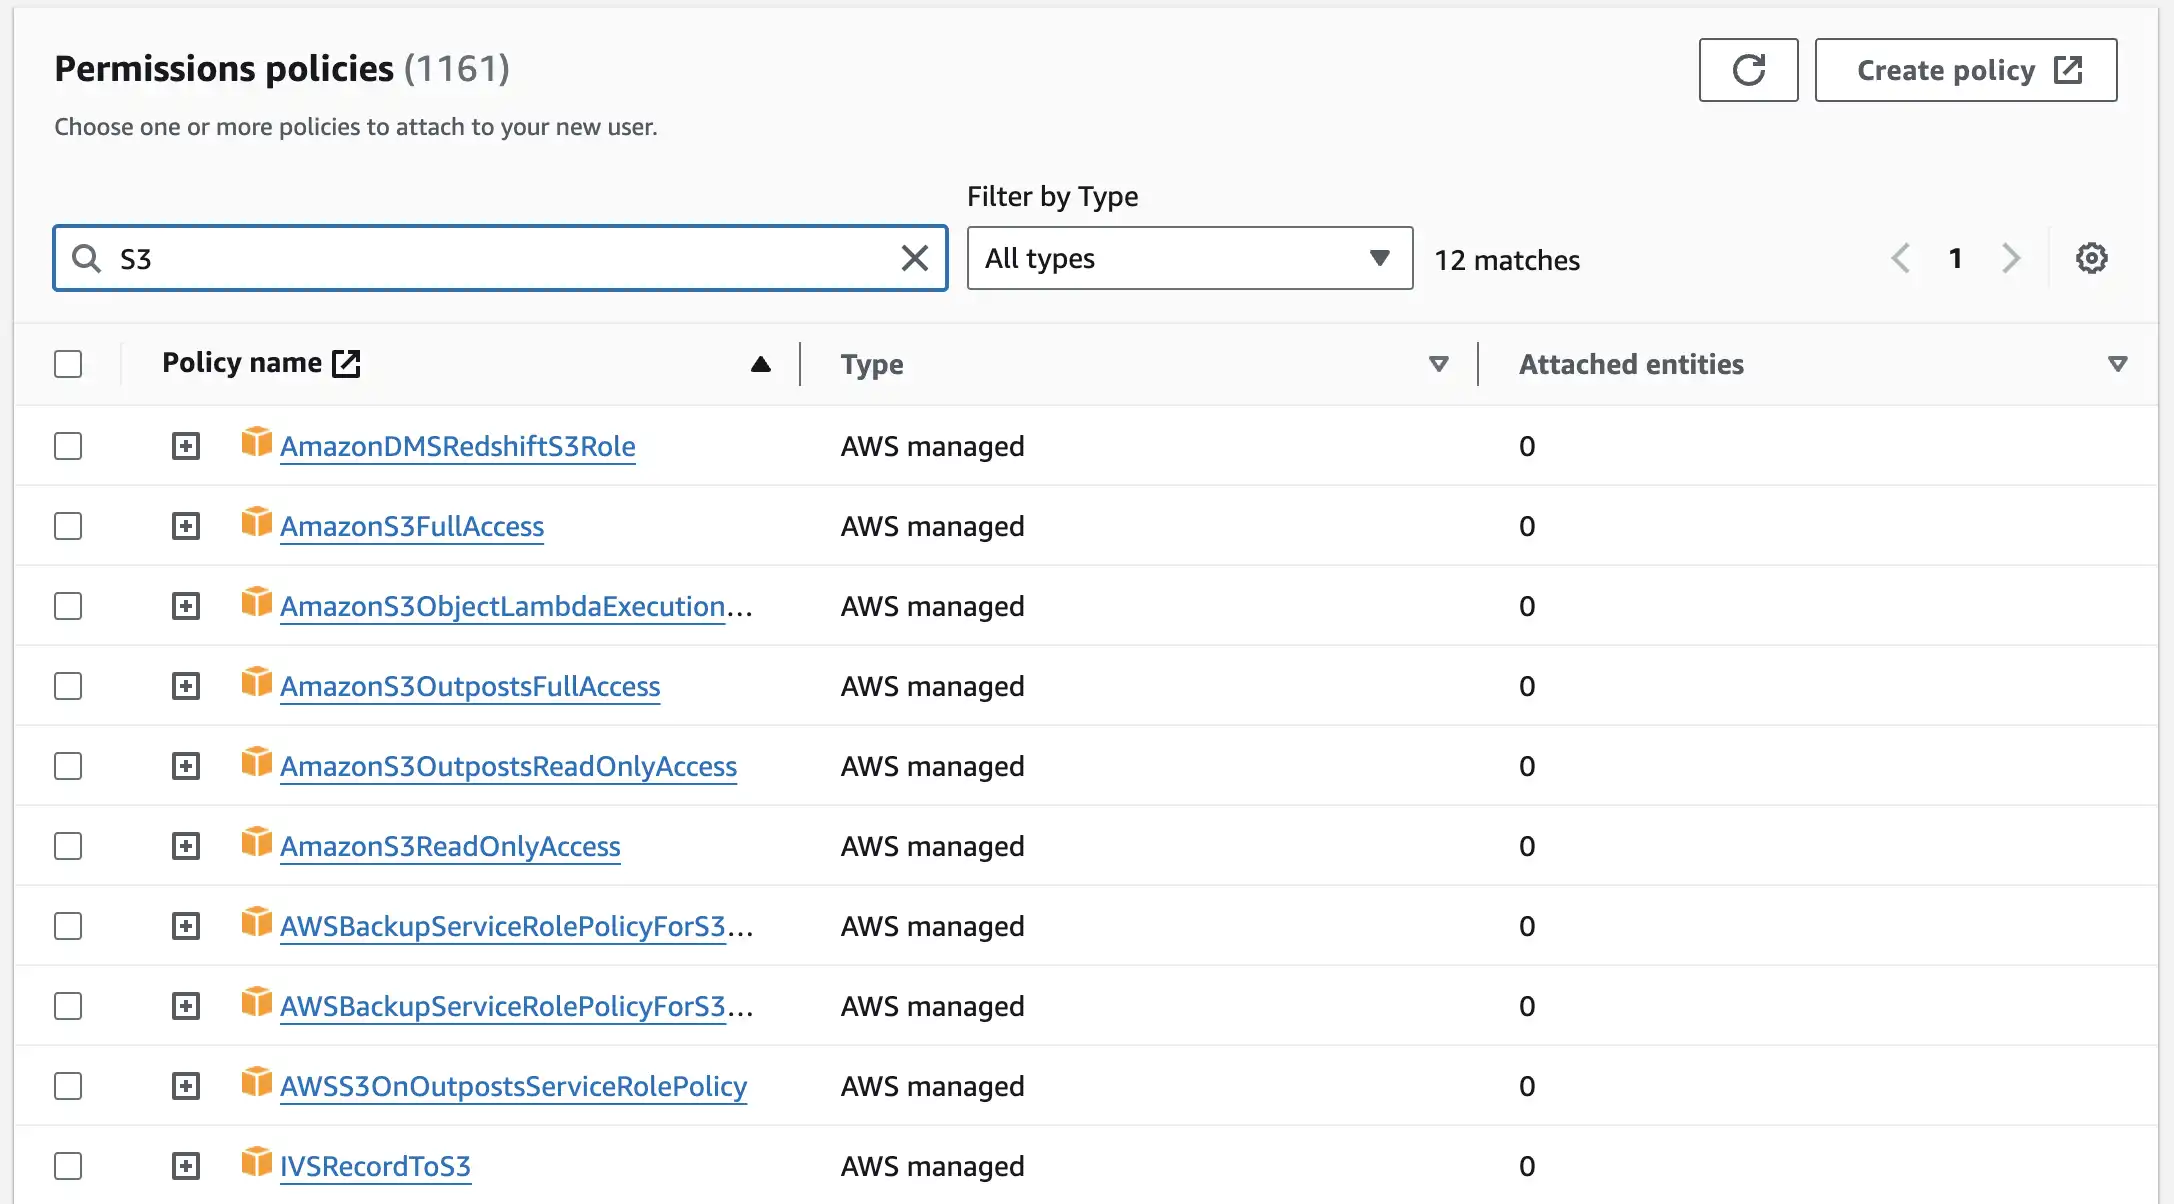
Filter for S3 and select AmazonS3FullAccess at Permissions policies table
Step 3: Review and Create User

Open user detail for created user, we need to create access key inside user detail
Click Create access key and pick Command Line Interface (CLI) then we are done
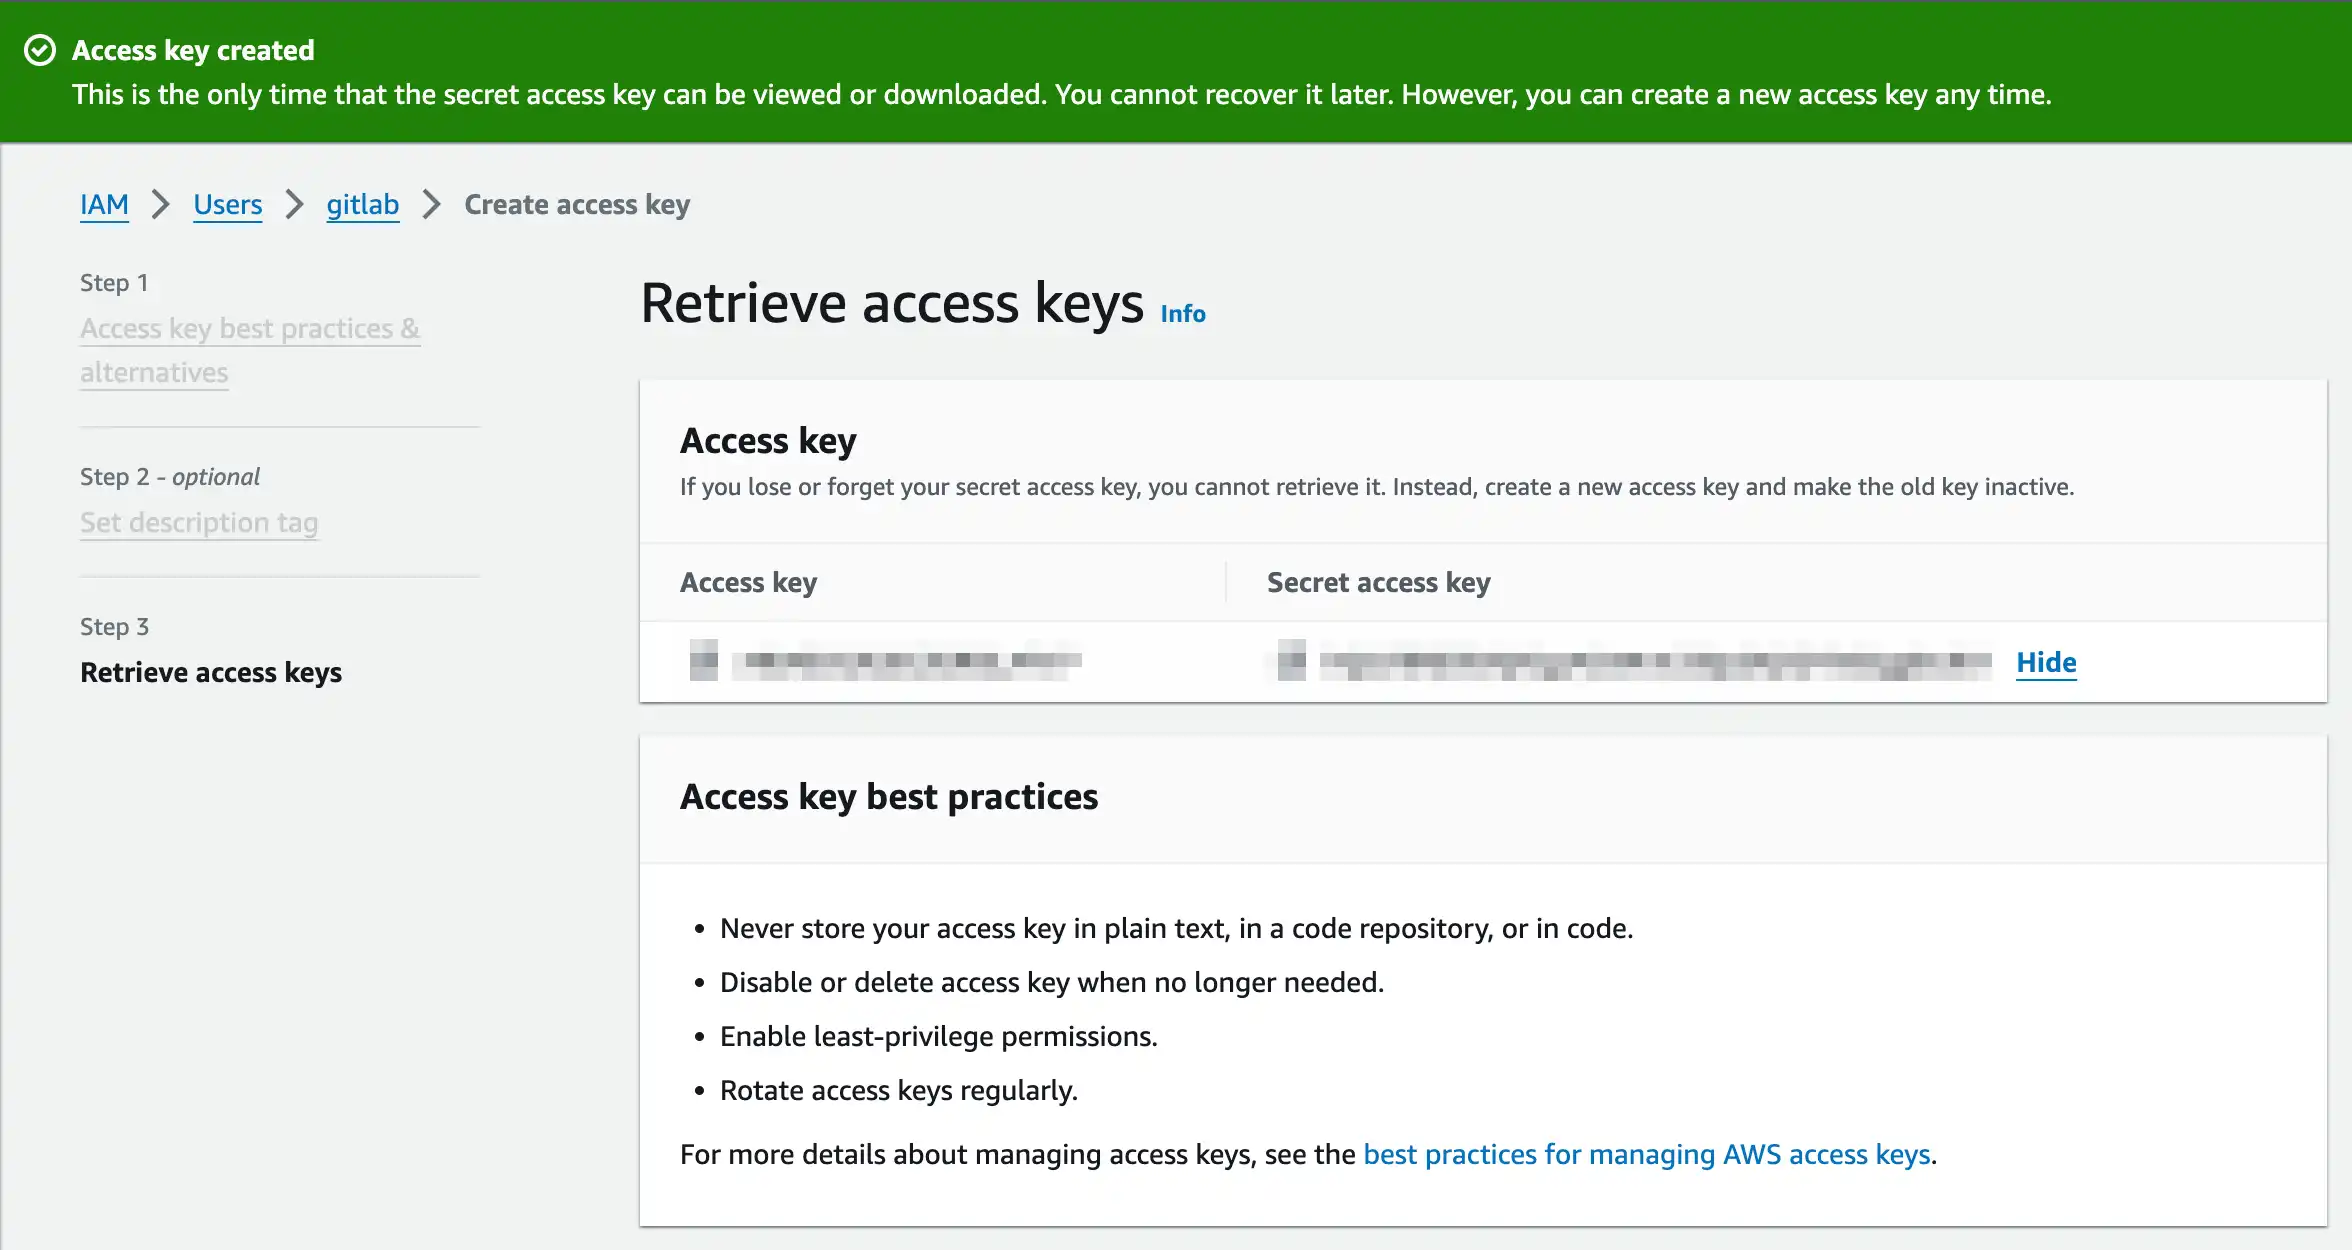
Don't forget to copy Access key and Secret access key, we need them for AWS CLI setup in CI/CD
Setting up pipeline variables
Typically when using aws-cli you need to export these variable along AIM user key. Here is an example
export AWS_ACCESS_KEY_ID=AKIAIOSFODNN7EXAMPLE
export AWS_SECRET_ACCESS_KEY=wJalrXUtnFEMI/K7MDENG/bPxRfiCYEXAMPLEKEY
export AWS_DEFAULT_REGION=us-west-2
Through this is not a good practice to put sensitive data in anywhere of project source code.
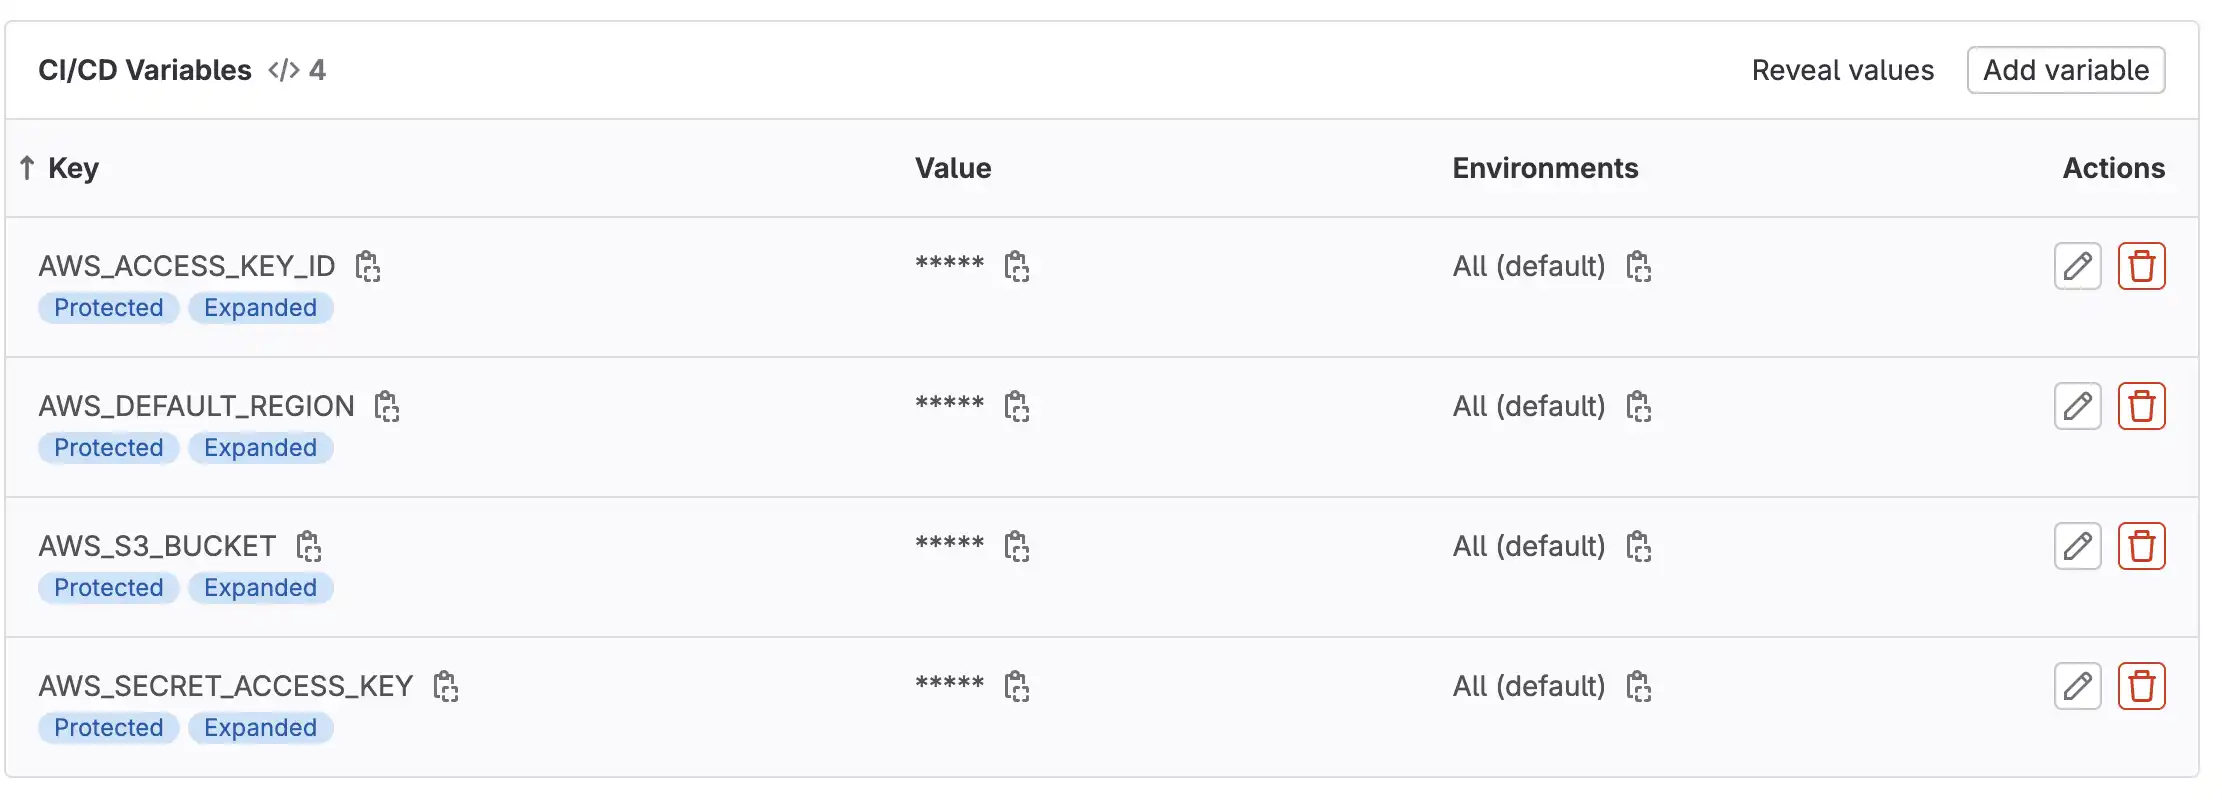
With that in mind, let's create CI/CD variable for:
- AWS_ACCESS_KEY_ID
- AWS_SECRET_ACCESS_KEY
- AWS_DEFAULT_REGION
- AWS_S3_BUCKET (for upload commmand)
Anytime pipeline runs, these variables will automatically exported. Open Settings => CI/CD => Add variables
Let's update CI/CD again to test if things work properly
deploy to s3:
  # stage: deploy
  image:
      name: amazon/aws-cli:2.14.5
      entrypoint: [""]
  script:
    - aws --version
    - echo "Hello Amazon" > hello.txt
    - aws s3 cp hello.txt s3://$AWS_S3_BUCKET/hello.txt
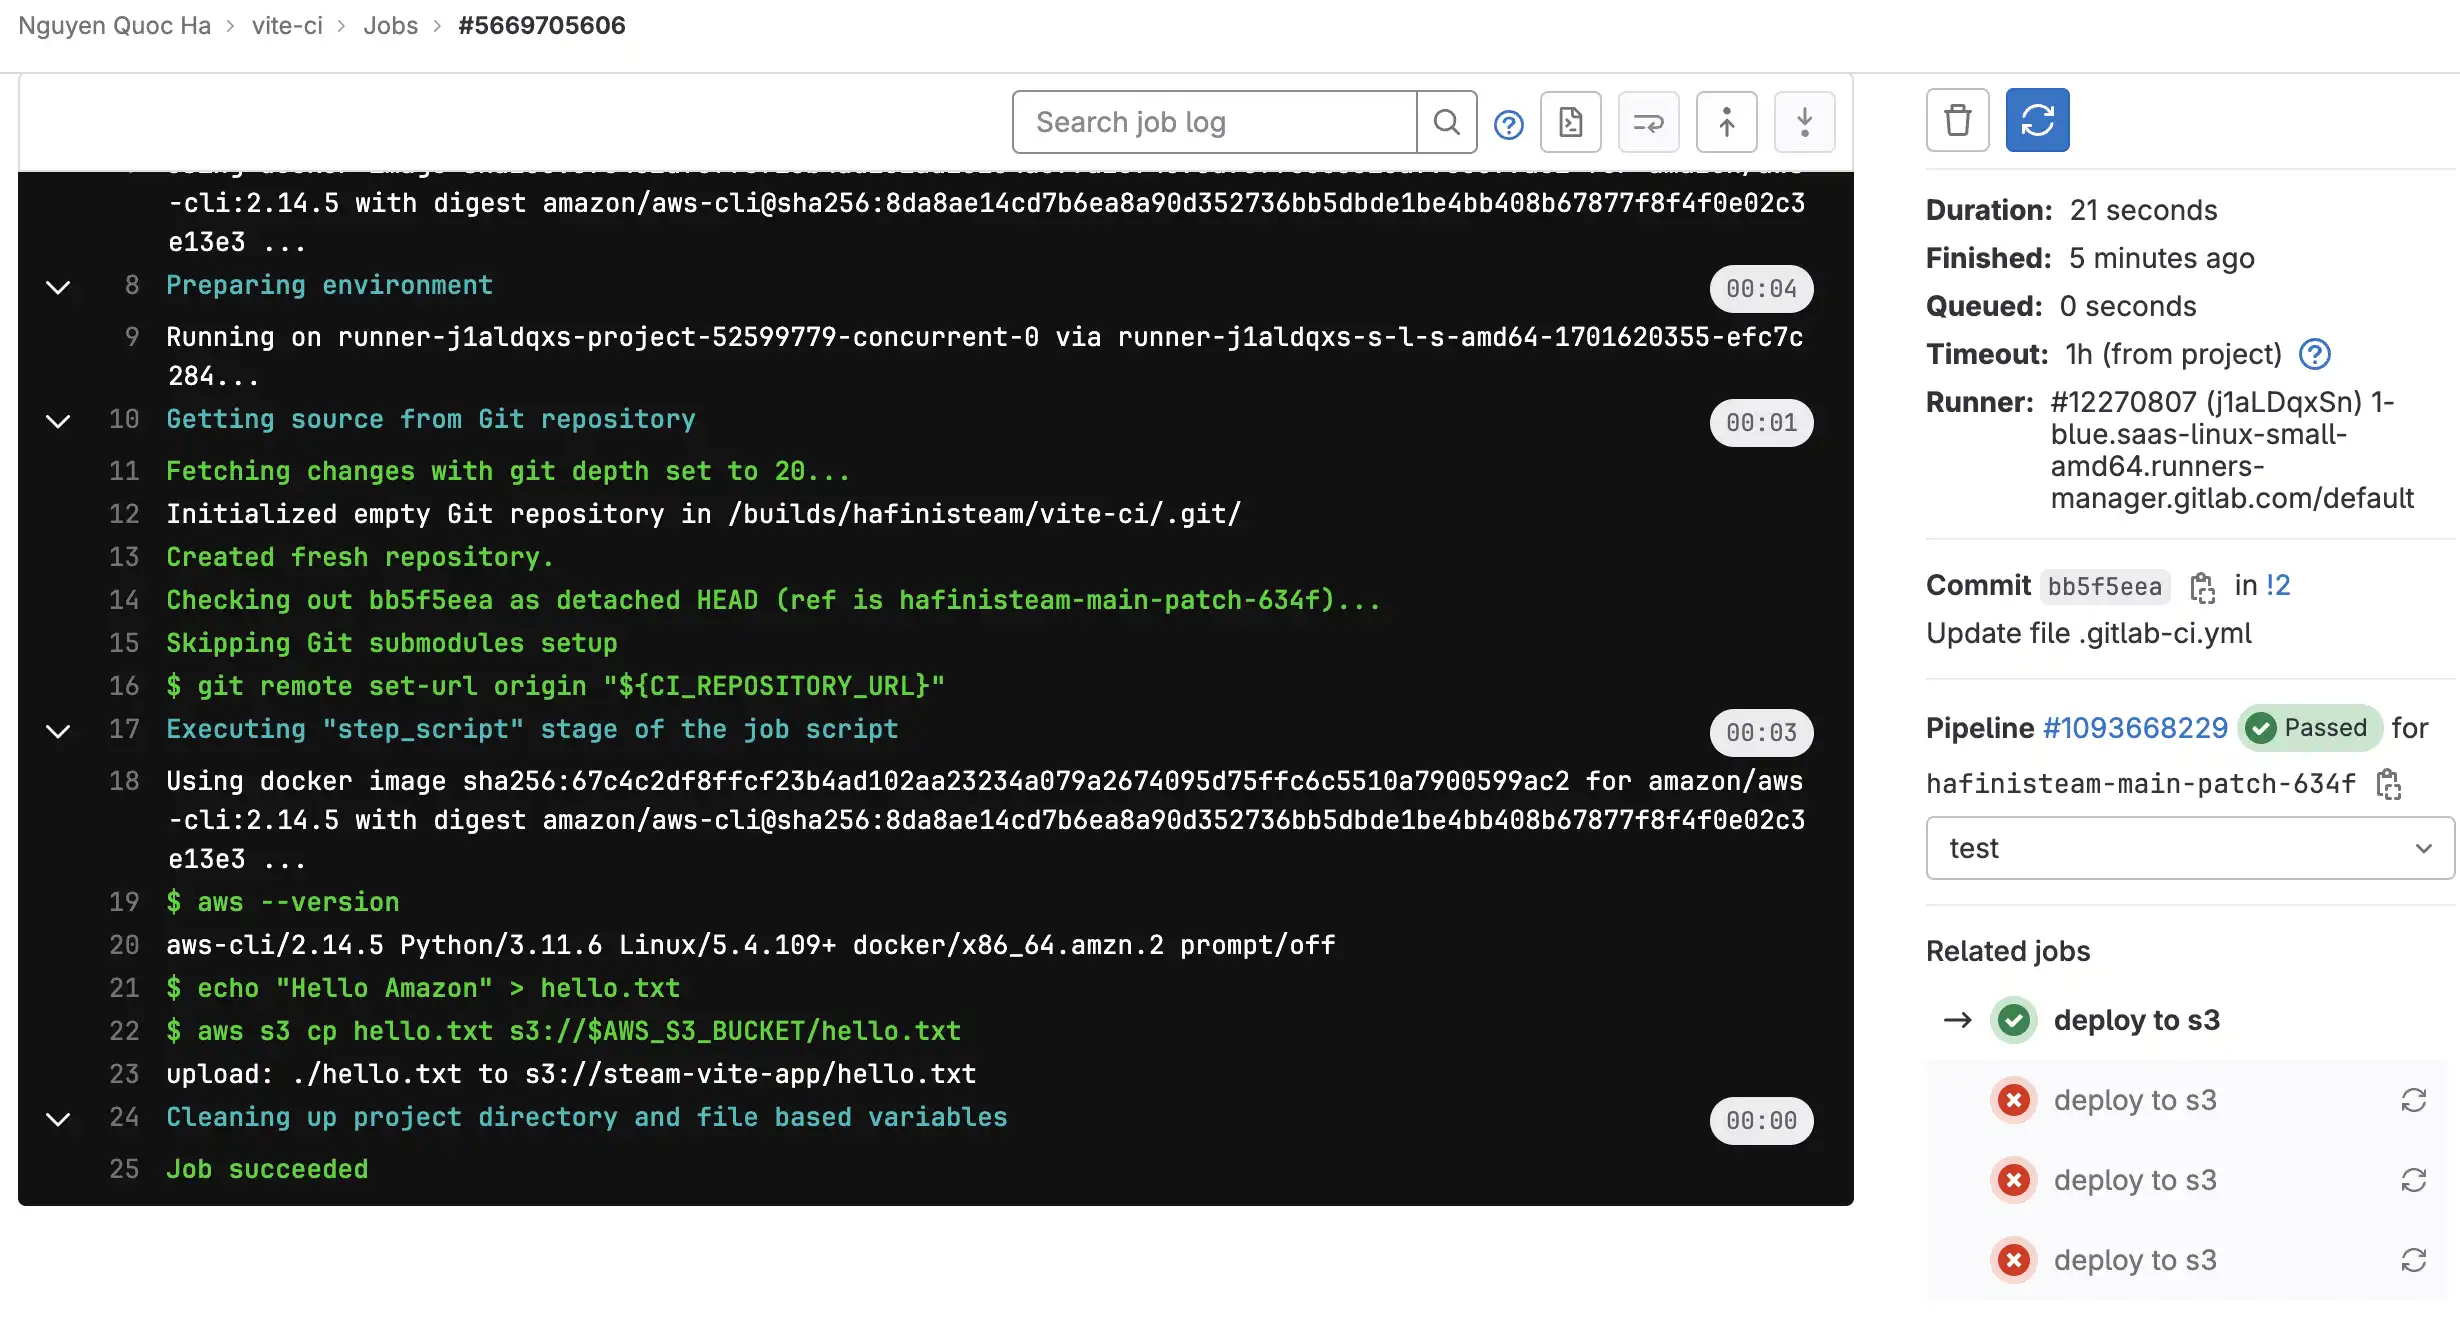
Check S3 bucket and see if file is upload successfully
Upload build folder to S3
Ok, so we are going back to uploading assets to S3, we did it before but it failed due to mssing credentials but now we can confidently do it again. Kick things off by updating pipeline configuration again
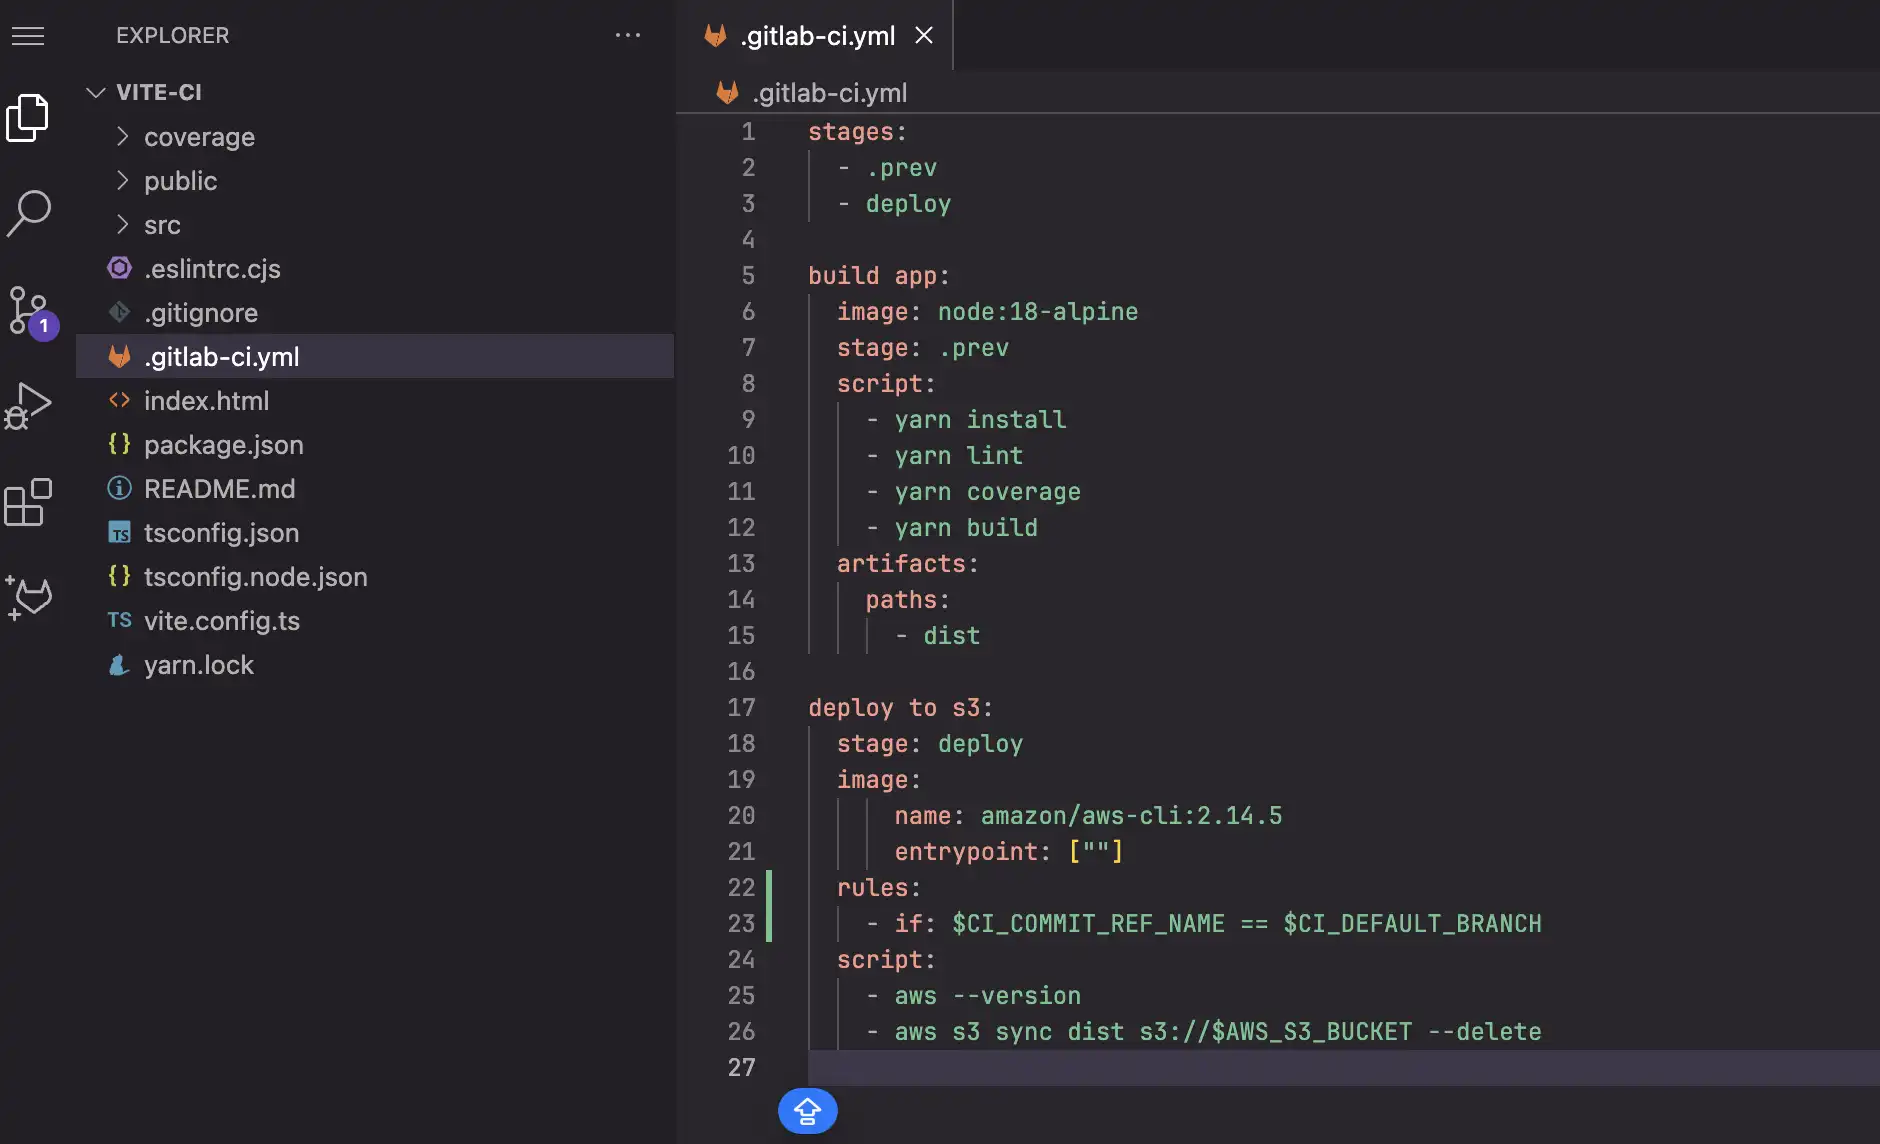
stages:
  - .prev
  - deploy

build app:
  image: node:18-alpine
  stage: .prev
  script:
    - yarn install
    - yarn lint
    - yarn coverage
    - yarn build
  artifacts:
    paths:
      - dist

deploy to s3:
  stage: deploy
  image:
      name: amazon/aws-cli:2.14.5
      entrypoint: [""]
  script:
    - aws --version
    - aws s3 sync dist s3://$AWS_S3_BUCKET --delete
Noted
- We add
buildjob tolintandtestto save time reusing Docker image synccommand is used to sync up whole folder, command line option can be futher viewed here: https://docs.aws.amazon.com/cli/latest/reference/s3/sync.html
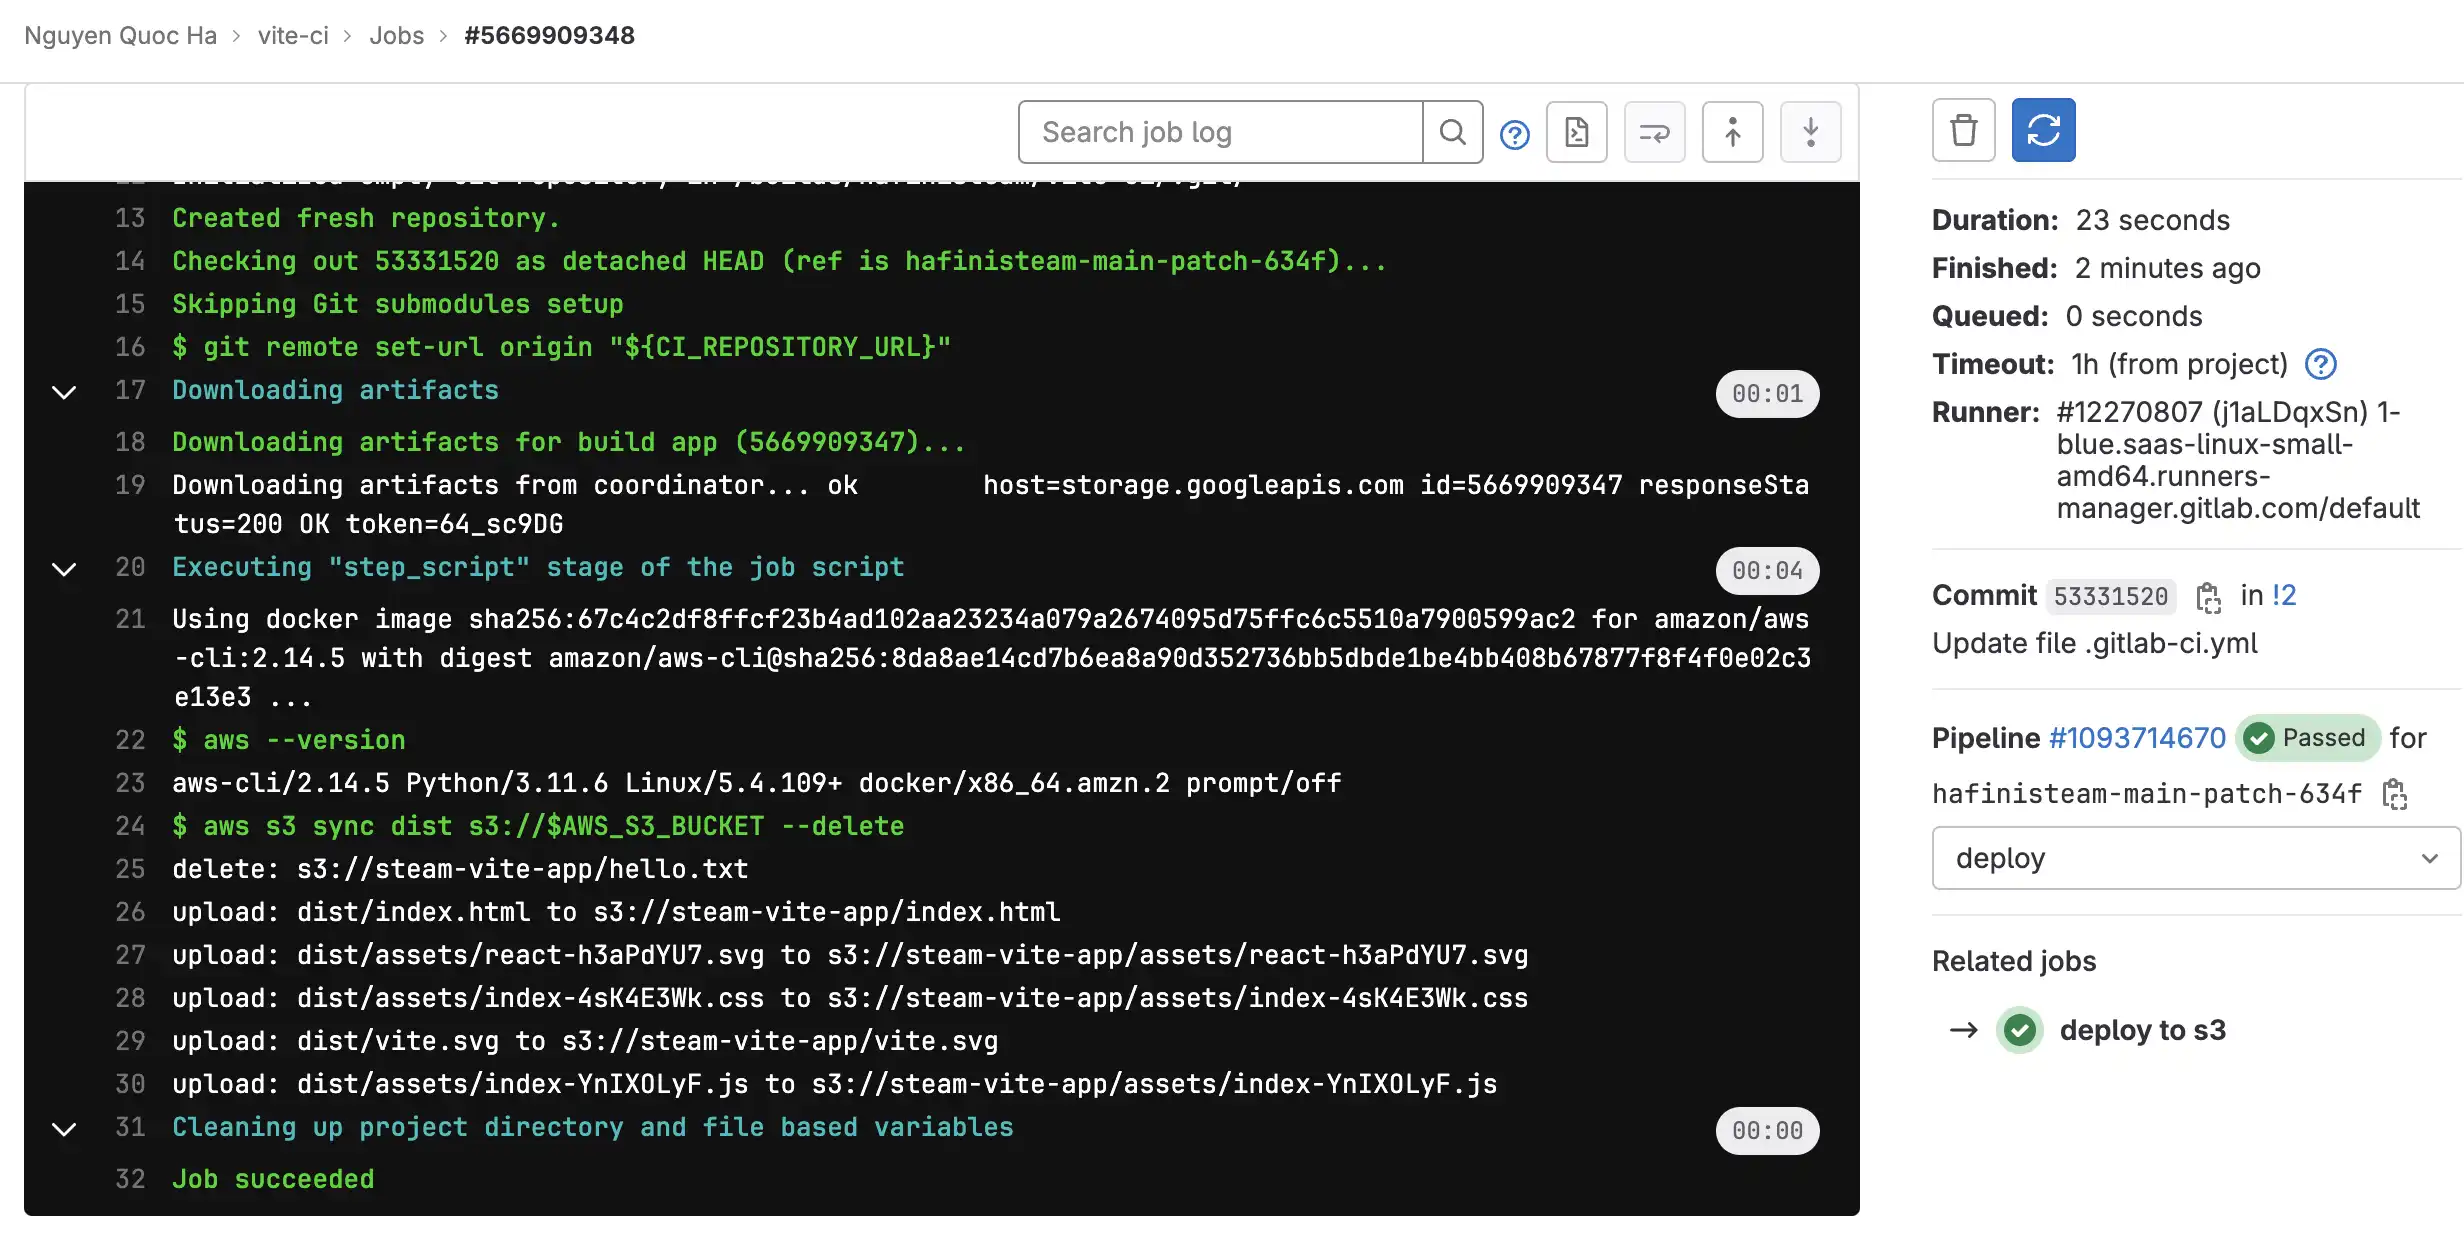
We have successfully uploaded app build folder to S3, now is the time to make it public, in other work host it to public access
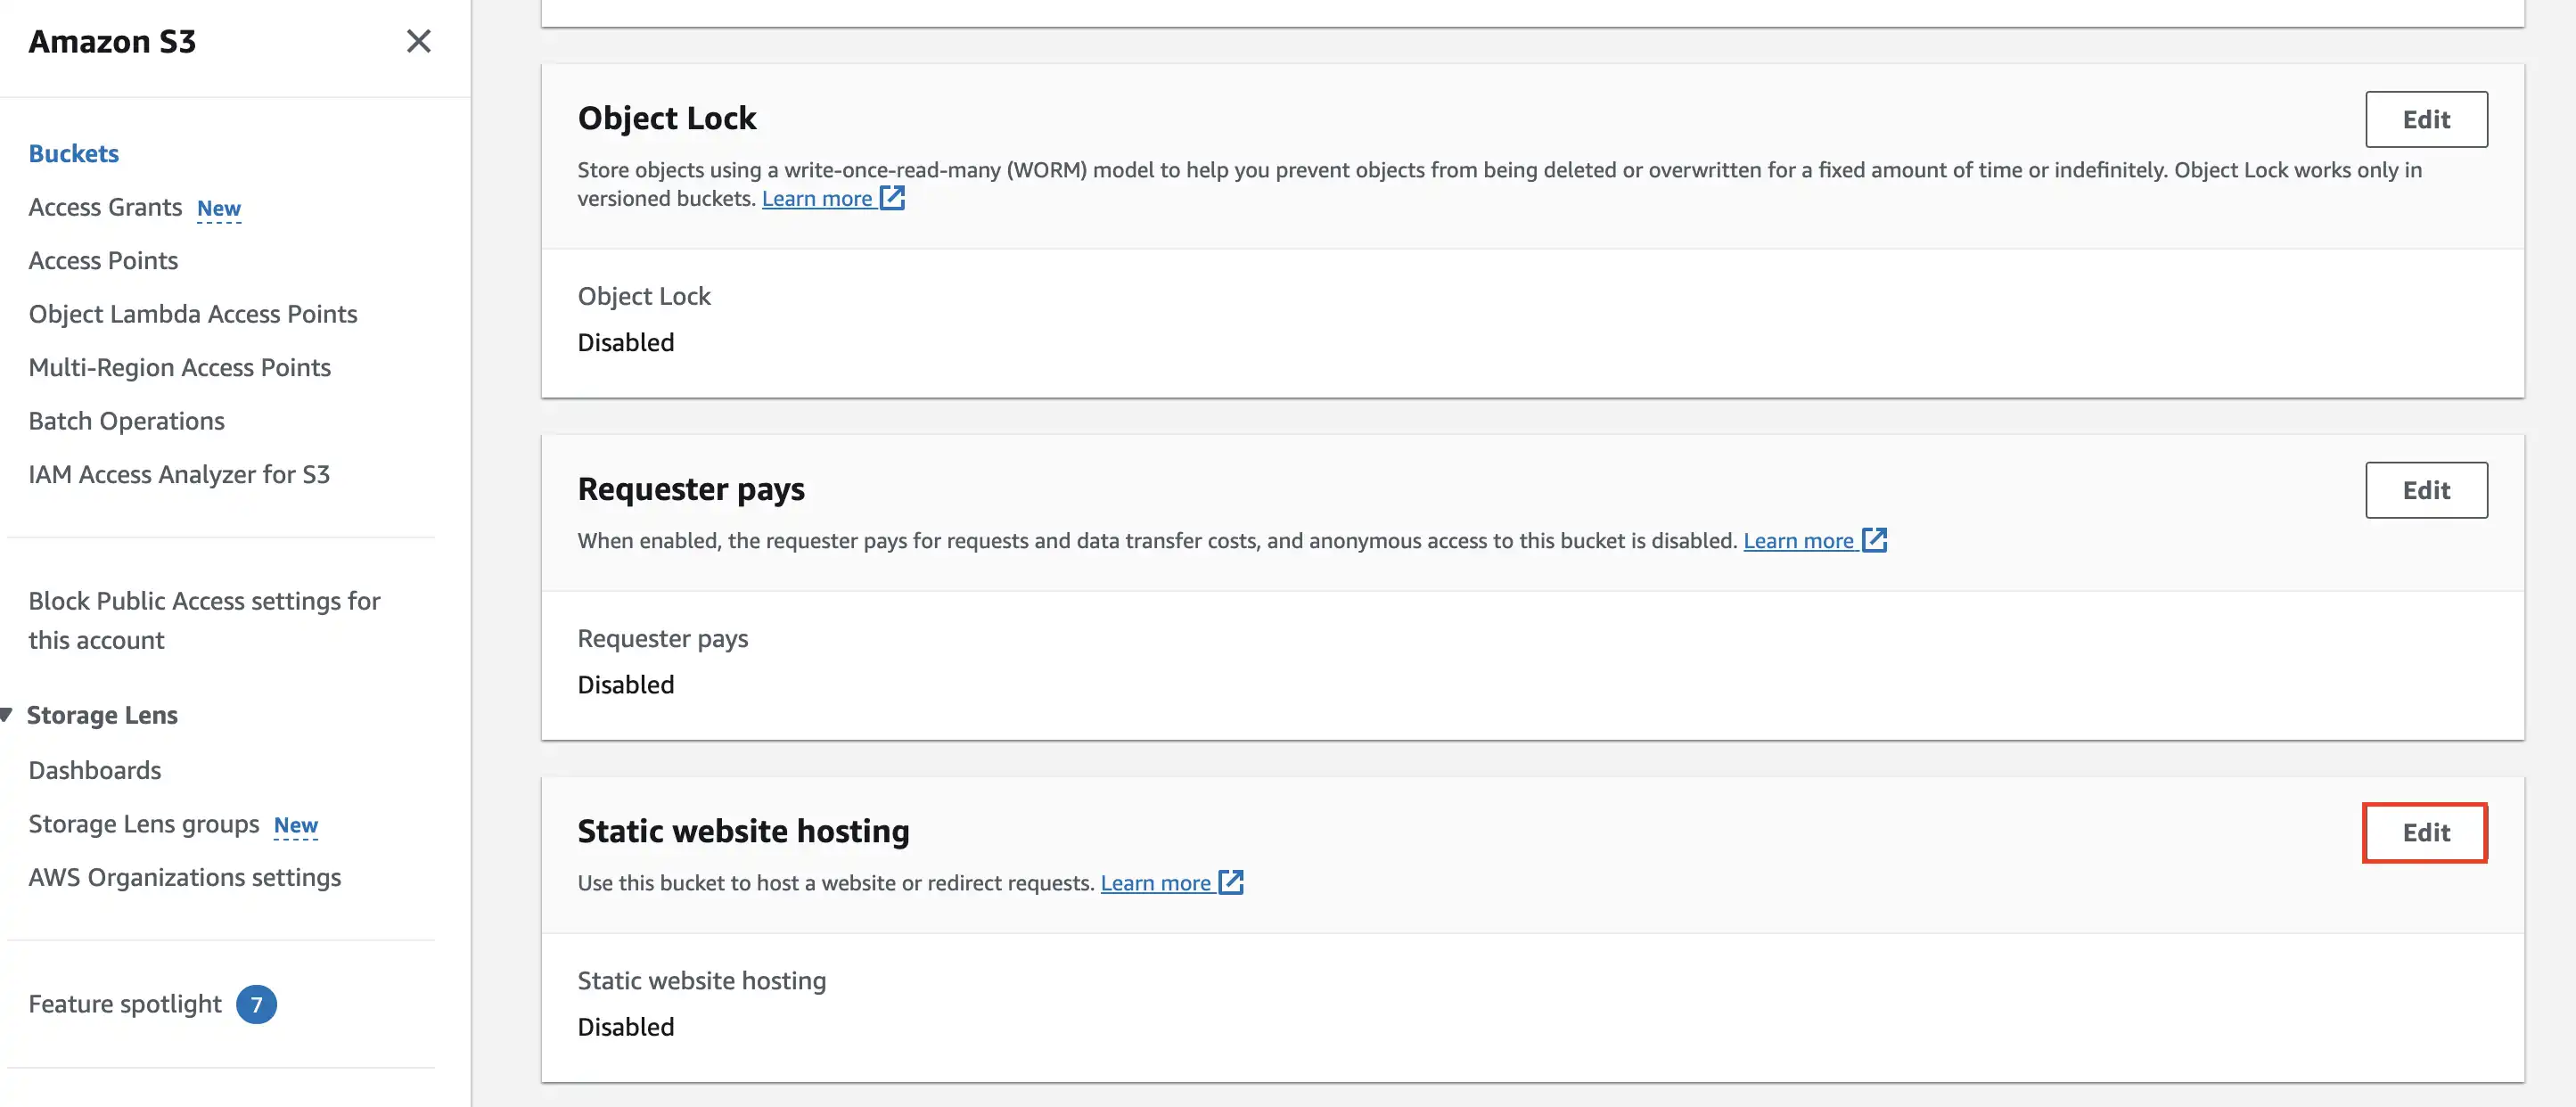
Hosting a website on S3
AWS S3 does not only act as a storage service but also has amazing feature to host a static website. To do that it is necessary to make some changes to bucket properties
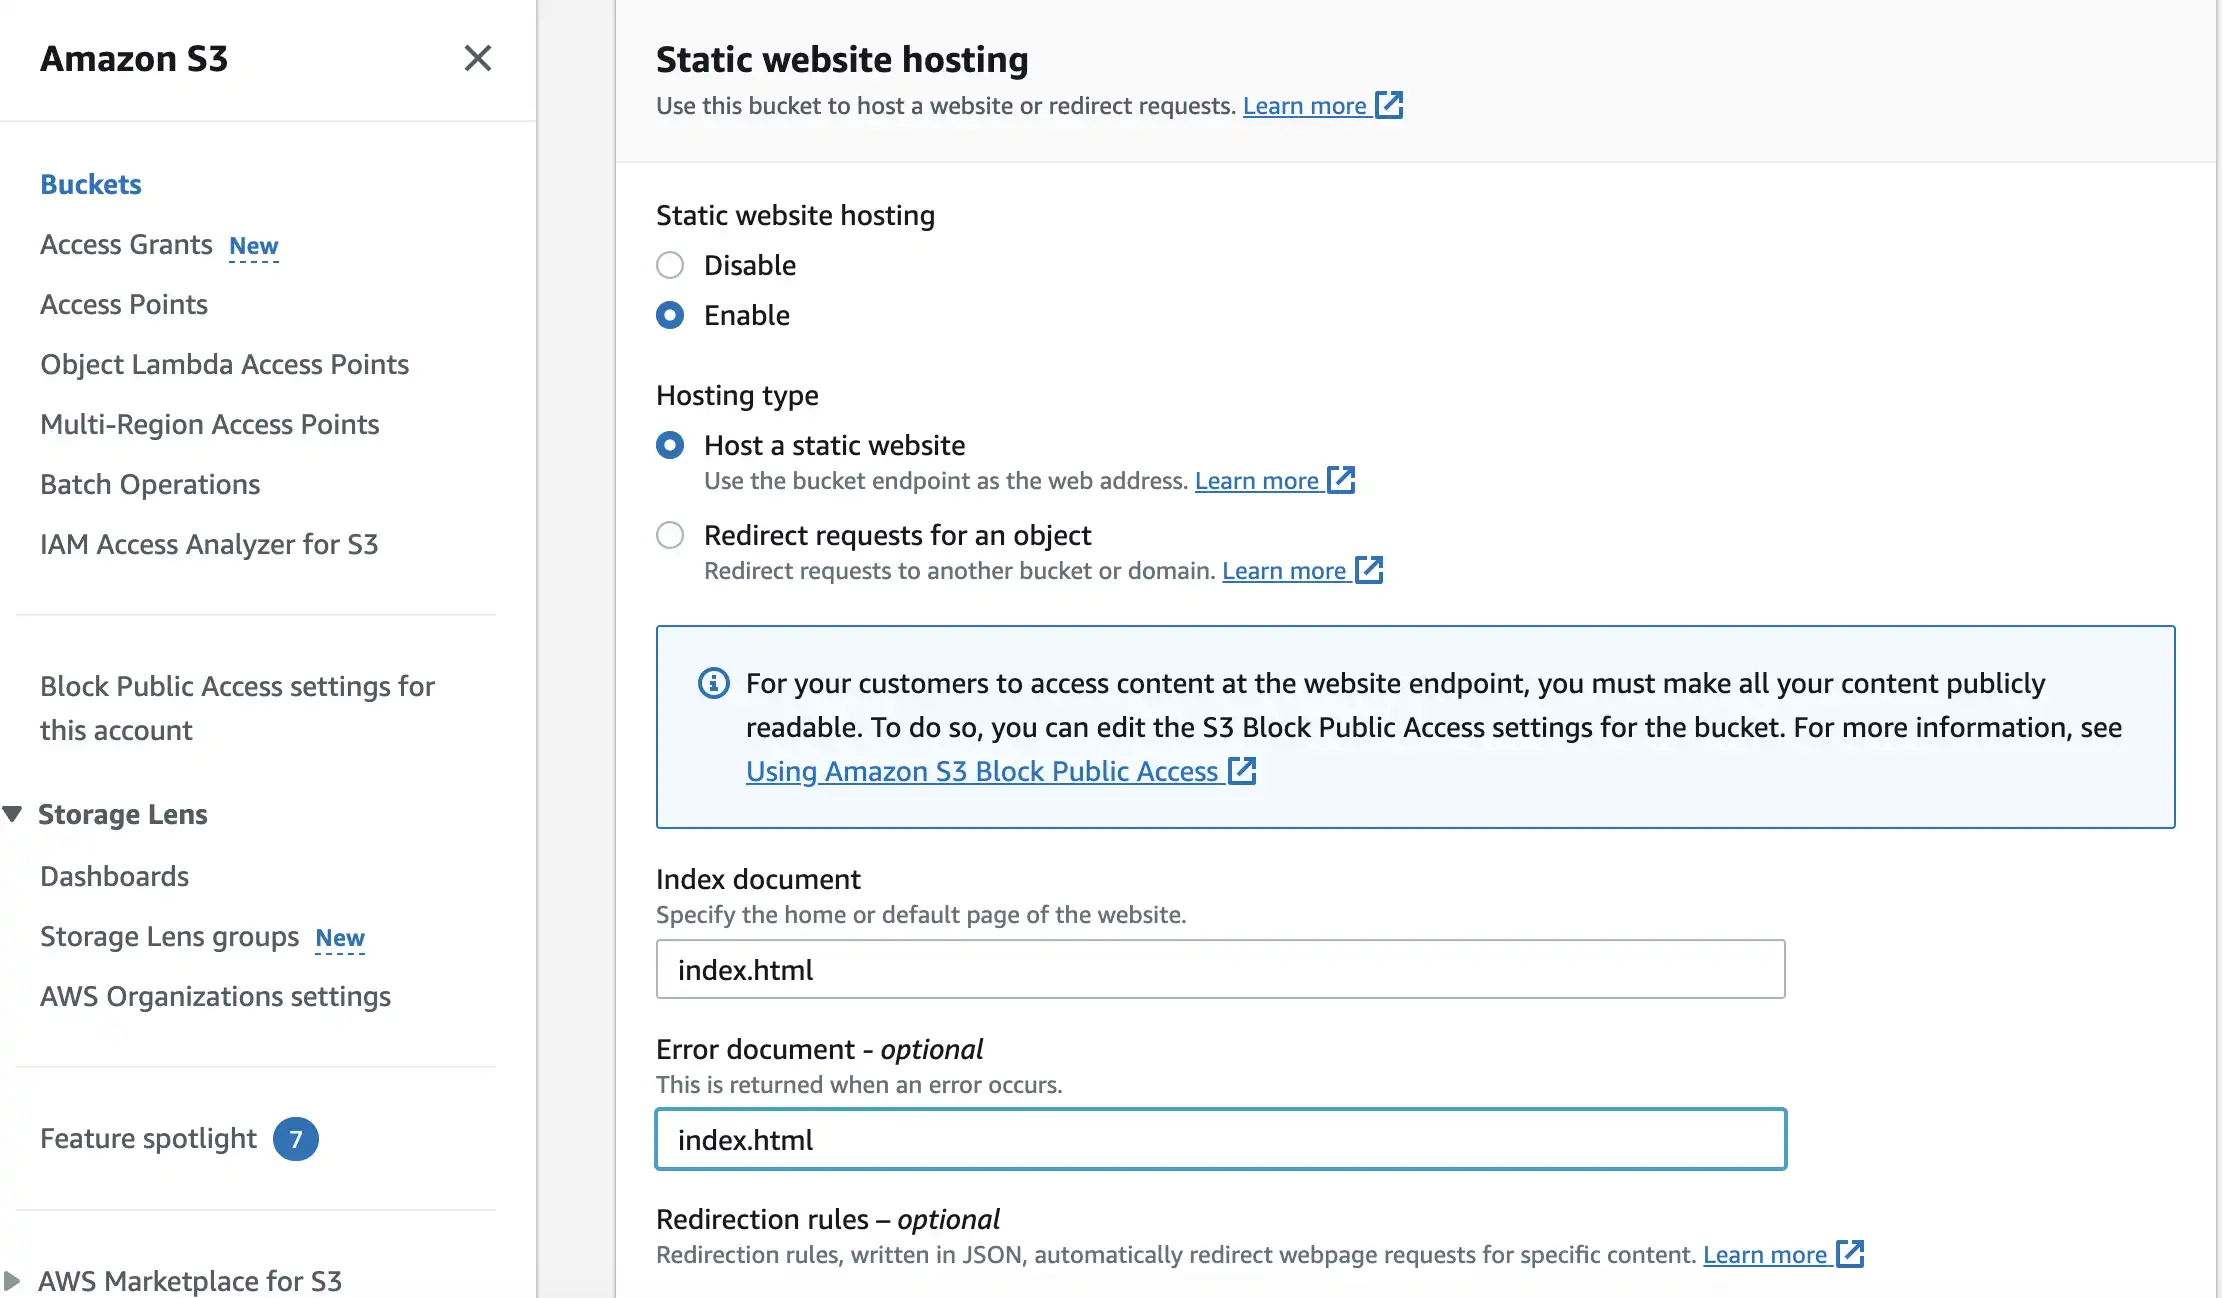
Open bucket and navigate to the second tab Properties, then scroll down to Static website hosting and click Edit
Fill in required info, Redirection rules is optional by the way
We're back to Properties tab, if you go down to Static website hosting again, you can see bucket is already assigned a domain name, let's open it
http://steam-vite-app.s3-website-ap-southeast-1.amazonaws.com
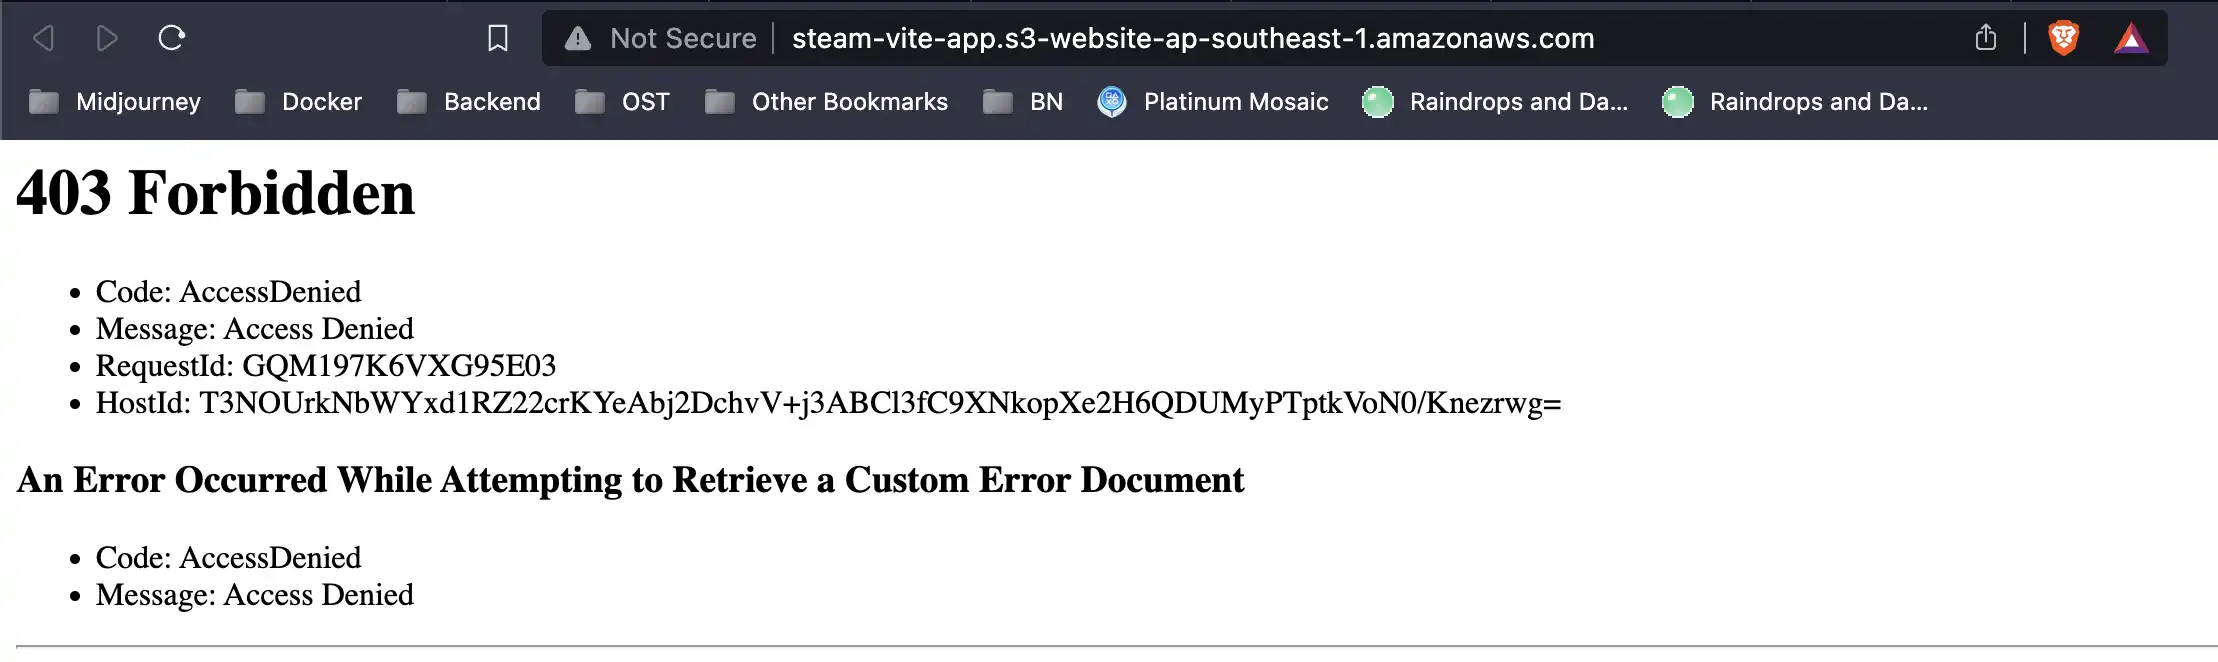
Opps !!! We've got 403 Forbidden error page, but no worry, this is normal for S3 when you first do web hosting, we must do some extra step to resolve this issue
Go to Permissions tab, go down to Block public access (bucket settings) and click Edit, then uncheck Block all public access, save changes and confirm
Access the host domain name again and got 403 Forbidden, seriously what is with S3 lol ? We actually need one more step. Still in Permissions tab, go down to Bucket policy and click Edit
With public bucket, S3 needs a JSON configuration for policies
{
	"Version": "2012-10-17",
	"Statement": [
		{
			"Sid": "PublicRead",
			"Principal": "*",
			"Effect": "Allow",
			"Action": [
				"s3:GetObject"
			],
			"Resource": "arn:aws:s3:::steam-vite-app/*"
		}
	]
}
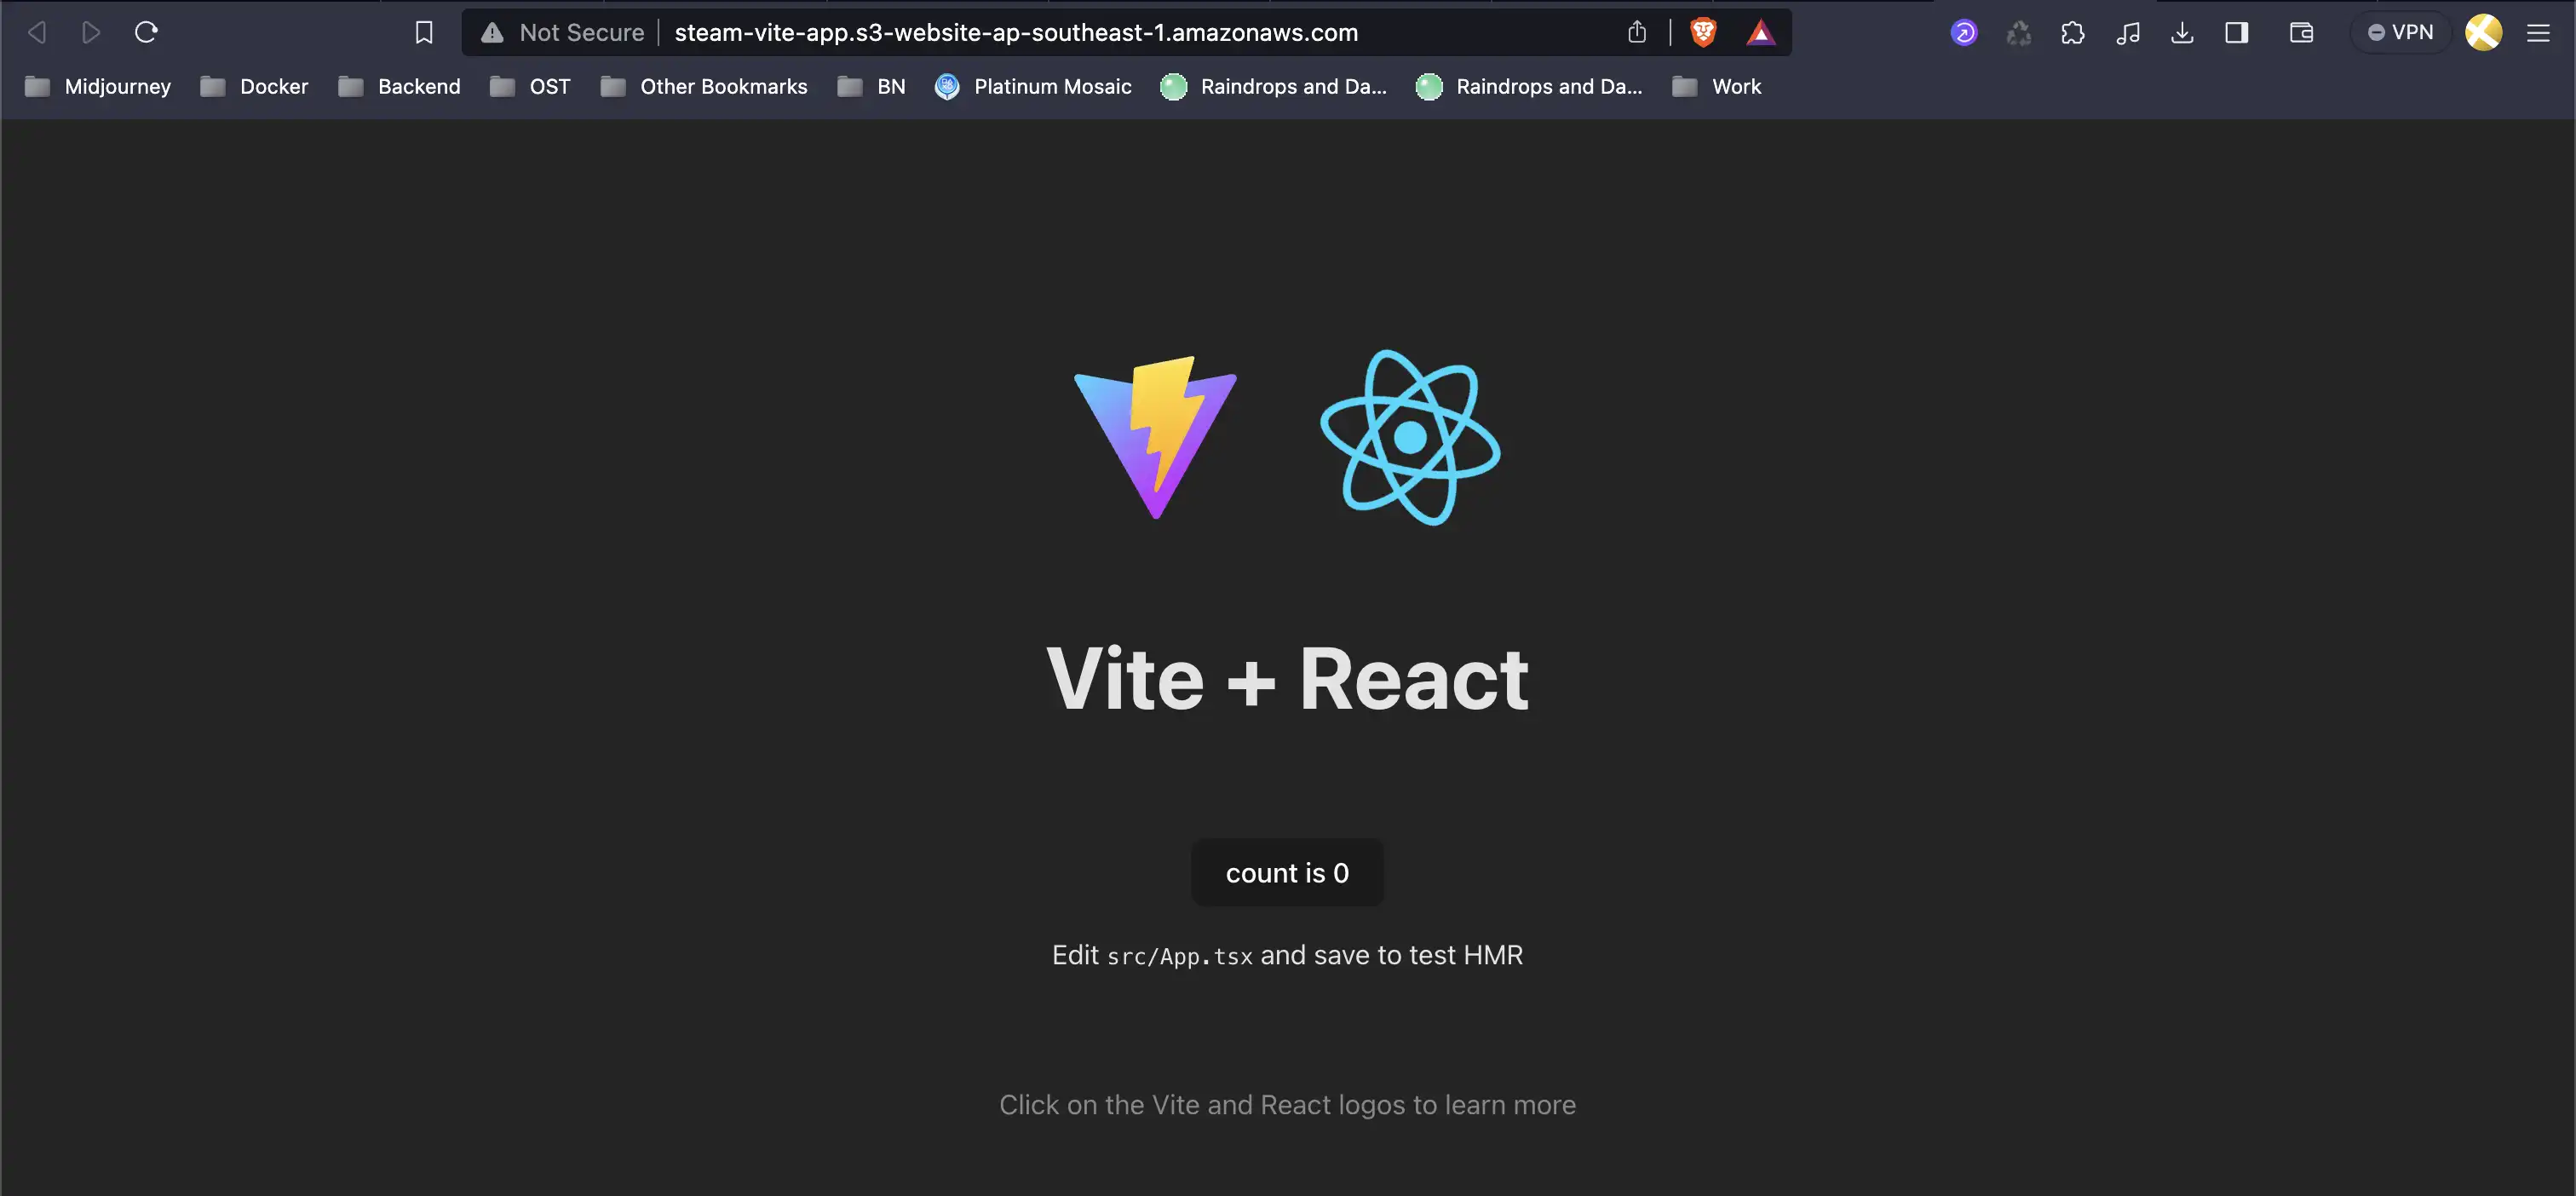
Since our focus is not S3 policies configuration so let's save changes and just make sure it works by refreshing web page again
Control when job runs
Now let's go back to the pipeline that we have designed, we have 2 stages: build and deploy.
Now if you think about it, this does not make any sense and what does not make sense is to deploy to S3 from a merge request or from a branch, if we think of S3 as our production server or production environment, anyone who opens a merge request if the build passes this will automatically get deploy to production, this actually not what we want. Only when the merge request is merged to main branch, the build will be deployed to production.
In order to archive this, we need to make a few changes to our pipeline
Noted
- Basically added rules mean if the committed branch is equal to
defaultbranch whichmainbranch in this case, the job will run $CI_COMMIT_REF_NAME: The branch or tag name for which project is built.$CI_DEFAULT_BRANCH: The name of the project’s default branch.- Check more Gitlab predefined variables at: https://docs.gitlab.com/ee/ci/variables/predefined_variables.html
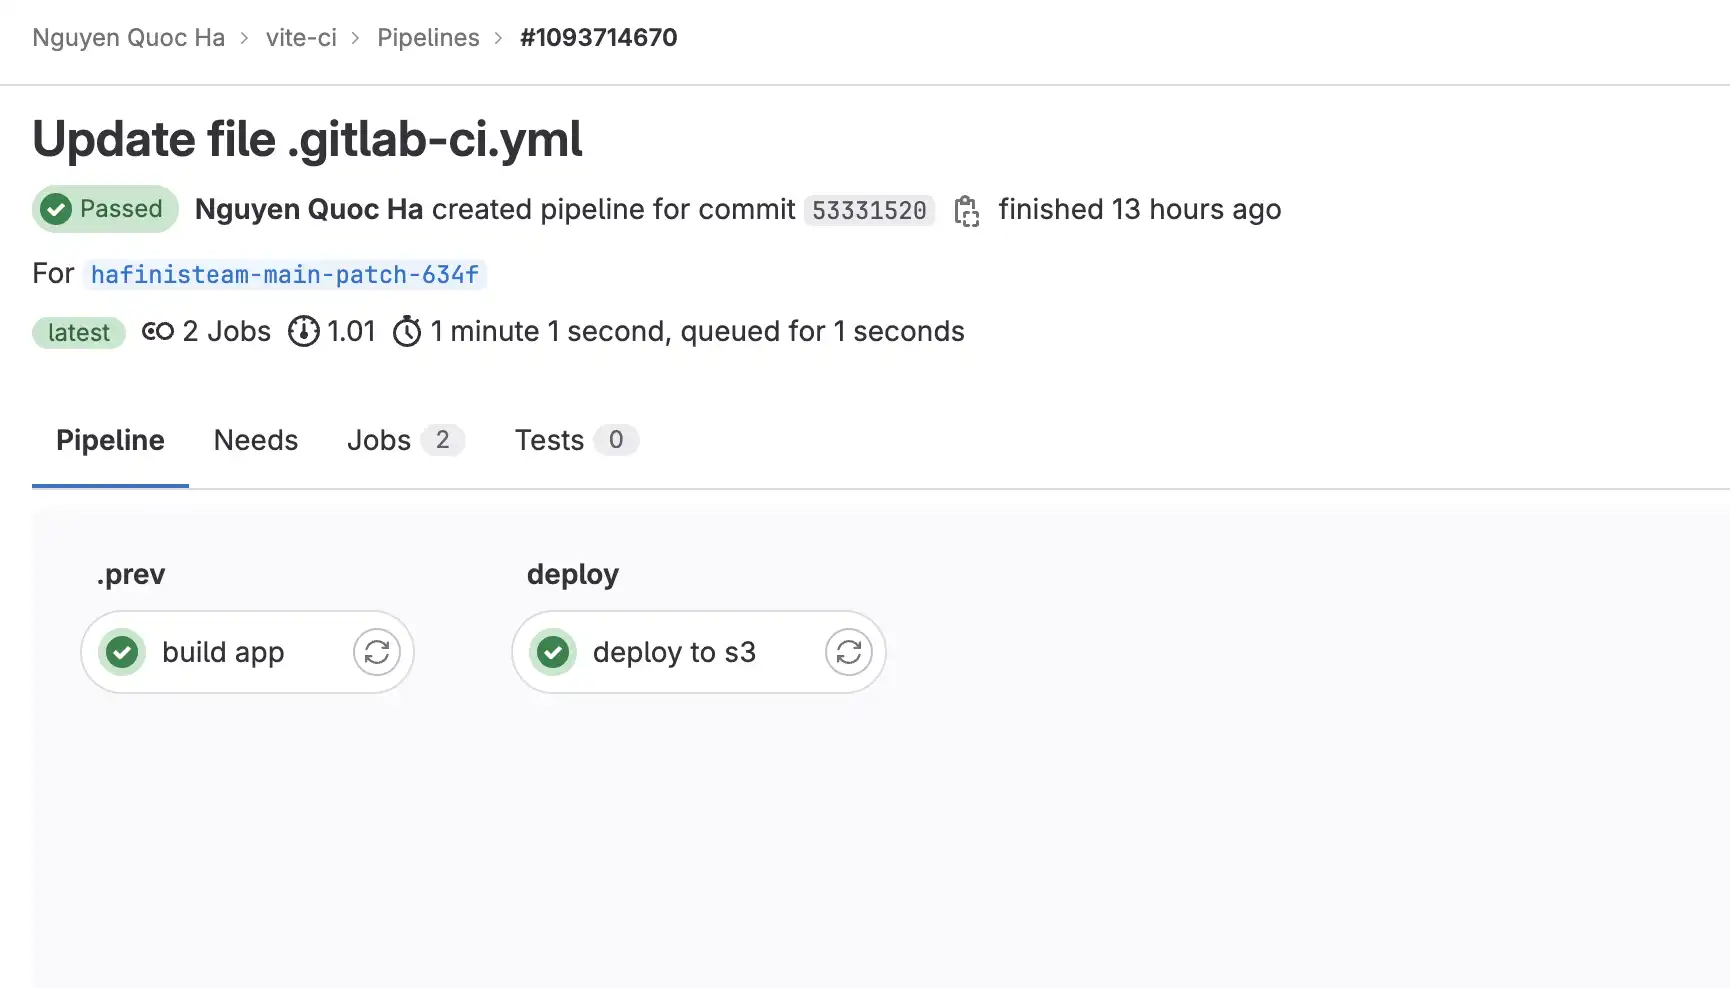
Commit and check pipeline again
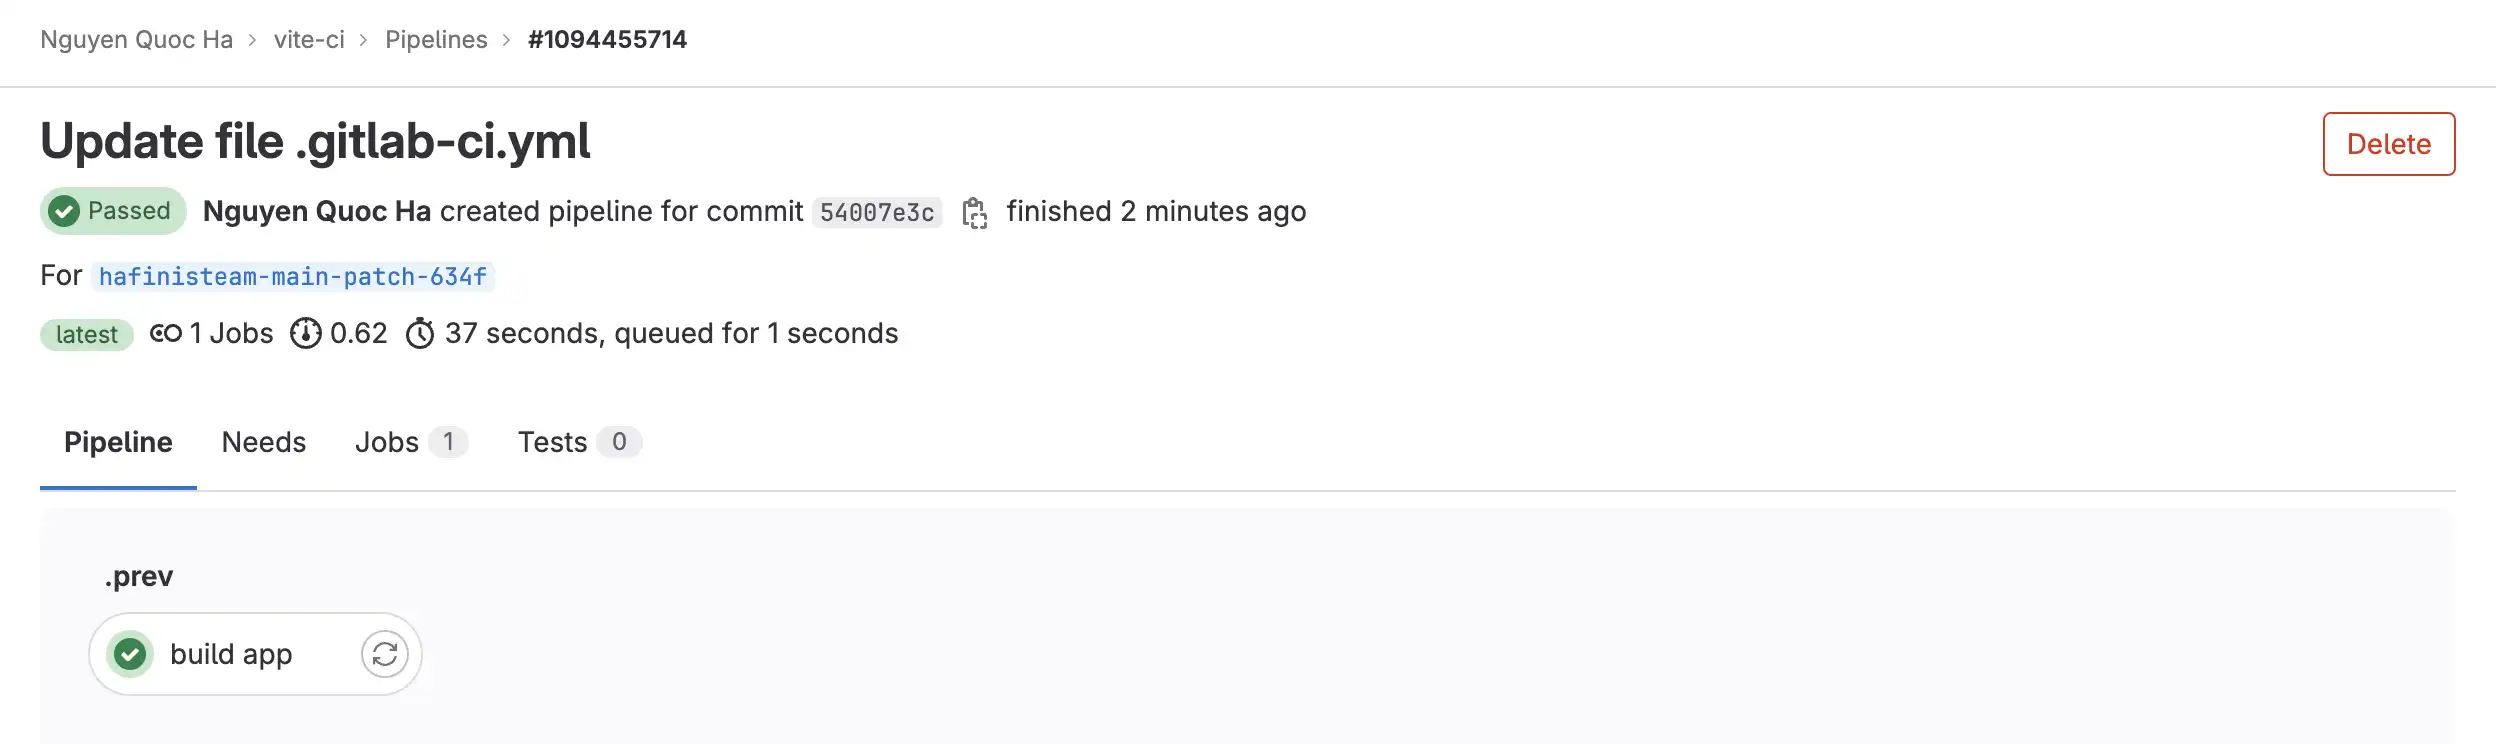
Now deploy job only runs when we commit to main branch, let's test it by merge the MR to automatically deploy to S3 again
Let's take a break here since the post is a bit long, in the next post we will tackle deployment environments topic.
Happy Coding 🍺🍺🍺 !!!